9. Multi-brand setup
This article highlights the importance of multi-brand configuration in Salesforce for Jobrock integration. Without proper setup, issues and manual actions may arise. Salesforce offers various configuration options, such as formula fields and dependent picklists, to link client codes to brand labels. Following the provided step-by-step instructions, admins can efficiently set up multi-brand functionality, ensuring seamless synchronization and user-friendly experiences.
Assessing the need for bulti-brand configuration in your implementation
To determine whether multi-brand configuration is necessary for your implementation, you can assess the client's requirements by answering a set of relevant questions.
Question 1:
Do you have multiple (sub)brands and do you intend to use the Contact Hub to engage with candidates from each of these brands separately?
Yes -> Multi-brand configuration is required
No -> Multi-brand configuration is NOT required
Question 2:
Do you want appointments, automations, and email communication from Jobrock to be on custom domains per multi-brand label?
Yes -> Multi-brand configuration is required
No -> Multi-brand configuration is NOT required
Question 3:
Can jobs/vacancies be linked to different brands, or will all jobs/vacancies be associated with a single predetermined brand?
Dynamic configuration to choose different brands per job/vacancy-> Multi-brand configuration is required
One fixed brand for all jobs/vacancies -> Multi-brand configuration is NOT required
If you've answered yes to any of the questions above, be sure to set up multi-brand configuration for that client.
Multi-brand configuration importance
If you don't configure multi-brand correctly, it can lead to two types of scenarios causing issues or requiring additional manual actions for Jobrock's proper functioning.
Firstly, if a multi-brand is not selected, it can create UI problems as Jobrock won't know which brand an action should apply to, necessitating the user to manually select the brand each time. Properly configuring multi-brand can prevent this extra manual step.
Secondly, if multi-brand is not enabled for specific objects like the job object, syncing jobs between Salesforce and Jobrock becomes problematic. Without the brand information, Jobrock cannot perform accurate synchronization. Hence, configuring multi-brand correctly ensures seamless job synchronization between the two platforms.
In cases where multi-brand configuration is not enabled, Jobrock will prompt users to provide the necessary multi-brand information. This information includes the brand label and its associated client code for each (sub)brand.
For example, omitting the "Client code" parameter in the configuration of the Sync Records Apex class for multi-brand environments can lead to issues. This misconfiguration is a common mistake observed at the job object level. It's essential to ensure that the "Client code" parameter is correctly set to prevent such problems during multi-brand setup.
As a result, all job records are incorrectly synced to the parent level instead of their intended child level. Properly configuring the "Client code" parameter is essential to ensure accurate synchronization and prevent such issues.
How to configure multi-brand
Jobrock must be provided with the client code for each relevant object. This client code is a crucial and unique identifier that Jobrock generates for each brand. This means that both the parent brand and each child brand under it will have their respective, distinct IDs.
In Salesforce, you have various options to implement multi-brand configuration. One approach is to use a formula field, where you can automatically assign the client code based on a specific value in another field. Alternatively, you can set up dependent picklists and link certain values in a picklist to their corresponding multi-brand client codes.
NOTE: These are just two examples of the available options, as there could be other custom solutions tailored to specific business needs and requirements.
Possible solution: Create a dependent picklist in Salesforce
To configure a dependent picklist in Salesforce and link the Jobrock client codes with the associated labels, follow these steps:
Step 1: Log in to your Salesforce account and navigate to the "Setup" menu.
Step 2: In the left-hand navigation panel, under "Platform Tools," select "Object Manager."
Step 3: Choose the object for which you want to create the dependent picklist. For example, if you want to configure the picklist for the "Contact" object, click on "Contact."
Step 4: Under the "Fields & Relationships" section, locate the field that will serve as the controlling picklist (e.g., "Brand"). Click on it to access its settings.
Step 5: In the "Values" section, click on "New" to create new dependent picklist values.
Step 6: Enter the values for each brand. In this example, "WorkforcePlus" and "PrimeStaff" are included, indicating that there are now two brands configured.

Step 7: Click "Save" to save your dependent picklist configuration.
You have successfully set up a dependent picklist in Salesforce. The next step is linking the brand labels with their associated Jobrock client codes. Then, when users select a brand, the corresponding client code will be automatically populated.
Repeat these steps for every object where multi-brand is relevant.
Associate brand labels with client codes
To set up a multi-brand configuration and associate client codes in Salesforce, where one field contains the brand label and an associated second field contains the client code for that (sub)brand, follow these steps:
Step 1: Log in to your Salesforce account and navigate to the "Setup" menu.
Step 2: In the left-hand navigation panel, under "Platform Tools," select "Object Manager."
Step 3: Choose the object where you want to associate brand labels with client codes for the multi-brand setup. For example, if you want to configure the multi-brand setup for the "Contact" object, click on "Contact."
Step 4: In the "Fields & Relationships" section, click on "New" to create a new formula field. Name the field, for instance, "Client code" and choose the formula return type as "Text."
Step 5: In the formula editor, write a formula that concatenates the "Brand" and related "Client code" fields together to display the multi-brand information in the desired format.
For example, the formula could be:
CASE( Brand__c ,
"WorkforcePlus", "AATCERDKFA",
"PrimeStaff", "AADFJTMEGA",
""
)
Step 6: Click "Next" and set the field-level security and page layout settings for the "Client code" field.
Step 7: Add the "Client code" field to the appropriate page layouts to ensure it is visible to users.
In the following example, the contact has been associated with the 'PrimeStaff' brand, and as a result of the above configuration, the corresponding 'Client code' has been automatically assigned.
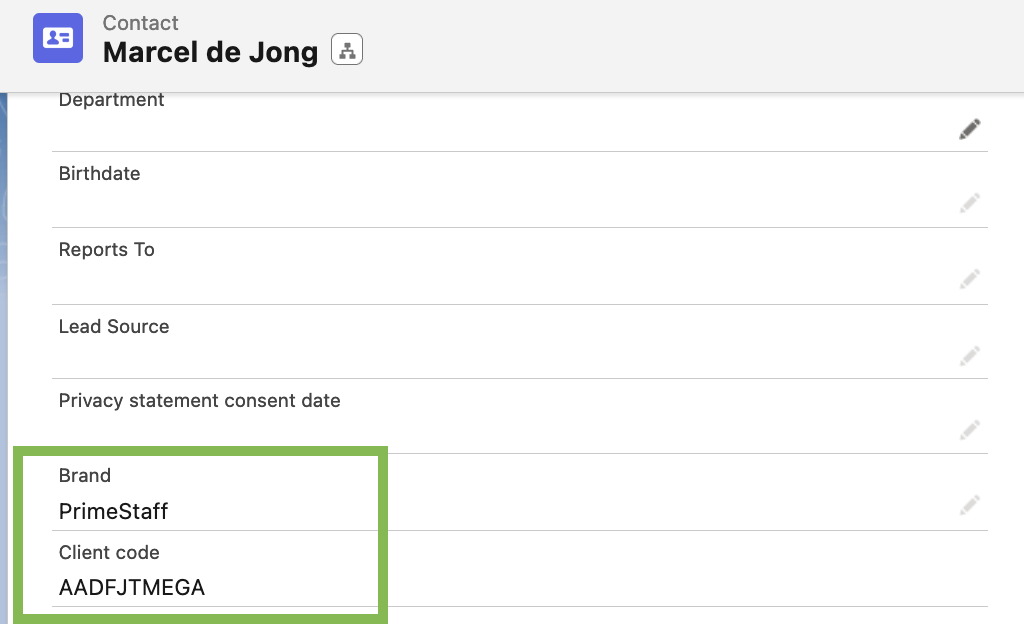
TIP: If preferred, the Client code field could also be hidden at an object level, ensuring that most users would not be presented with this data.
You have now set up a multi-brand configuration and associated client codes with brands in Salesforce. Users will be able to select the brand label and its corresponding client code will be displayed automatically.
Repeat these steps for every object where multi-brand is relevant.
Multi-select on user-level
In the context of multi-brand configuration, the client code associated with each brand plays a crucial role. Jobrock uses this unique identifier to determine the user's access rights, showing only the relevant brands and assets to the user. By correctly configuring the brands with associated client code, Salesforce admins can control a user's access to specific brands, deciding which features, assets, and environments they can interact with in Jobrock.
Jobrock relies on the client code to create user profiles and determine their access to brands. When a user starts using WhatsApp or sending out automations, the brand dictates the client code allocated to that user in Salesforce. Consequently, the user interface displays only the WhatsApp templates and automations associated with the permitted brand. This level of access control ensures that users cannot view or select child environments they are not authorized to access.
NOTE: Salesforce admins need to associate the parent brand of a company with every user. For example, if a user should have access to a child brand, the admin must add both the parent brand and the specific child brand to the user's profile. This ensures that Jobrock receives the required client codes, allowing users to access the appropriate brands and associated features.
Salesforce admins can efficiently manage user access to various brands in Jobrock. This strategic setup ensures that users have access to the right environments, templates, and campaigns, enhancing productivity and ensuring a seamless multi-brand experience within Jobrock's platform.
For detailed instructions on how to associate brands with user profiles for multi-brand orgs, click here.
Single-select on vacancy level
In Jobrock's multi-brand setup, every vacancy is intrinsically linked to a specific brand. This association plays a crucial role in determining the environment where the vacancy needs to be created and which feeds it will be displayed in. To efficiently manage this process, the concept of "client codes" comes into play, acting as unique identifiers for each brand.
Since a vacancy can only be associated with one brand, the single-select option becomes a necessity at the vacancy level. If the multi-brand configuration is correctly established, Jobrock already possesses the necessary information about the brand and to which client code a particular vacancy is associated. This eliminates the need to request the recruiter to manually select the brand from a dropdown, streamlining the process and ensuring accuracy.
One of the viable solutions, as mentioned earlier in this document, is creating a dependent picklist where each brand is associated with a client code. With this configuration, when a user selects a brand name, the corresponding client code is automatically linked, eliminating the need for manual data entry.
In conclusion, the interconnection between vacancies and brands is streamlined by Client Codes in Jobrock's multi-brand setup. The single-select requirement at the vacancy level ensures precision in brand association, while the use of dependent picklists enhances automation and data accuracy. These collective efforts lead to a seamless experience in managing vacancies within Jobrock's multi-brand environment, ensuring optimal productivity and brand-specific execution.
TIP: The 'Client code field' could also be hidden at the vacancy object, ensuring that most users would not be presented with this data.
Configure multi-brand in the JR WhatsApp SF widget
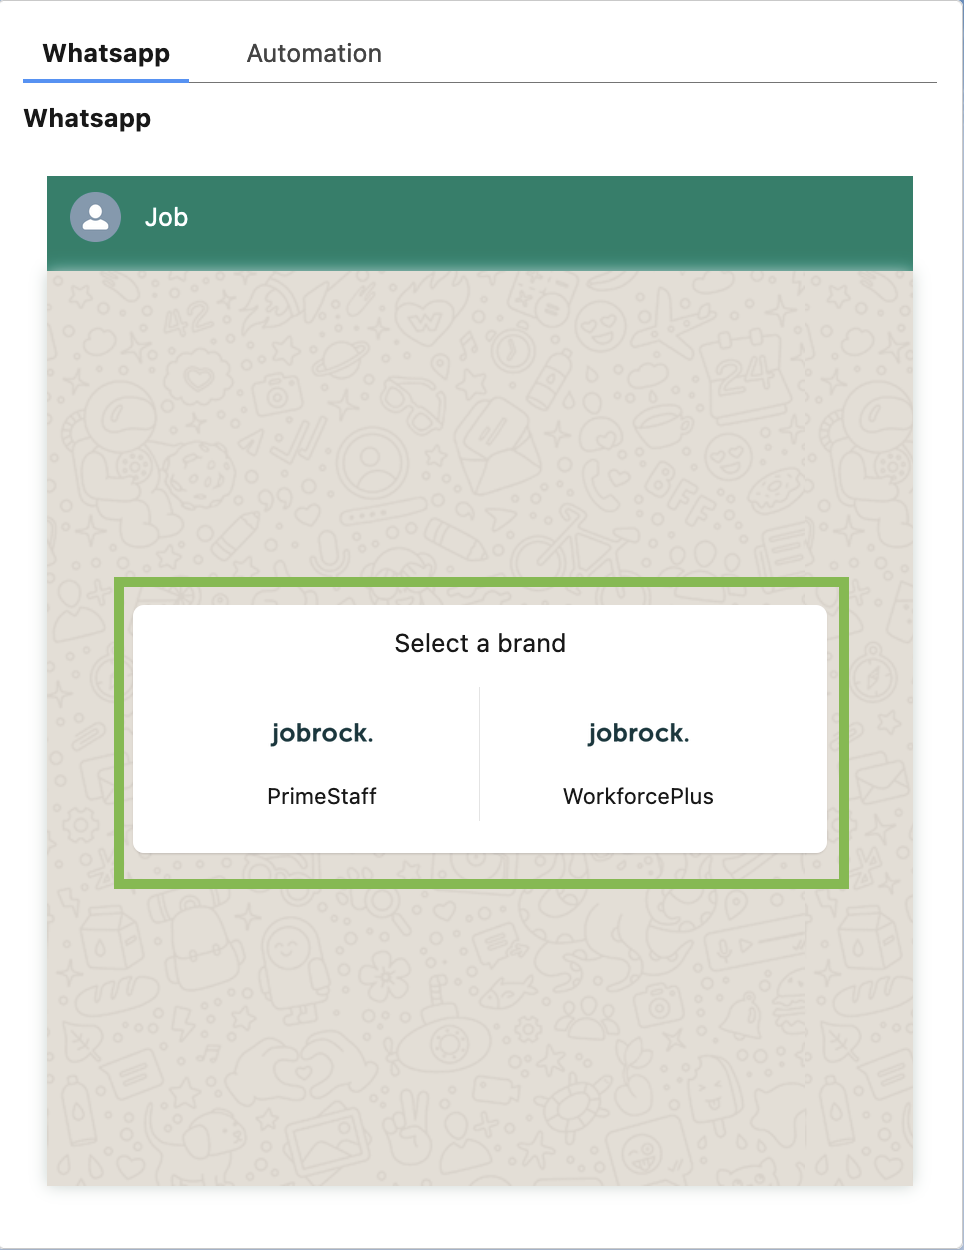
For instance, in the WhatsApp widget, when multi-brand is not configured, the user must manually select the brand before WhatsApp templates are loaded and the corresponding templates become available for selection. This manual action repeats itself every time a user wants to use the WhatsApp widget to communicate with candidates.
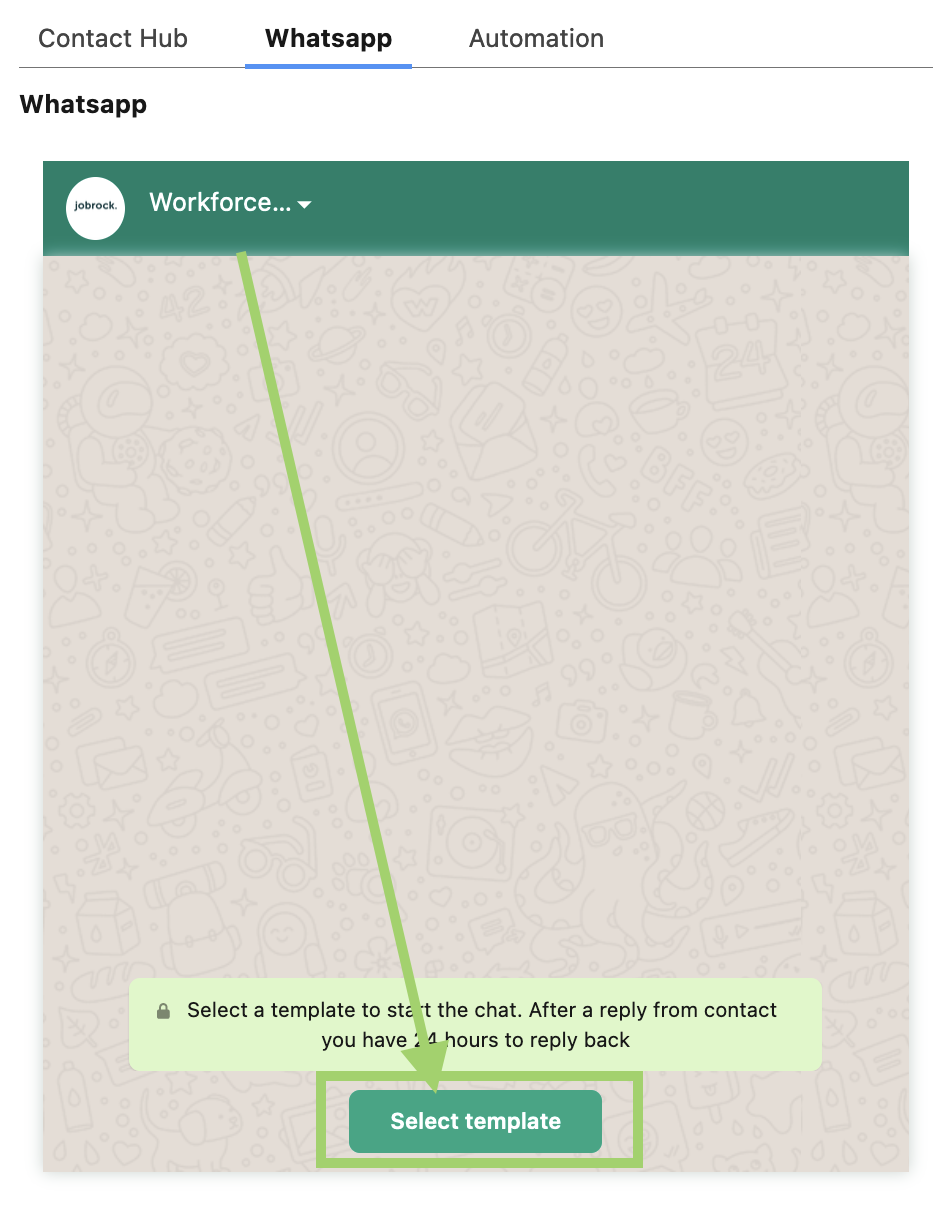
When multi-brand is configured correctly in the widget, the associated brand is selected automatically and the user can select a WhatsApp template immediately, which saves every user a manual action each time.
For detailed instructions on how to configure multi-brand in the JR WhatsApp SF widget, click here.
Configure multi-brand in the JR Contact Hub
To ensure a smooth user experience in the Jobrock Contact Hub widget within Salesforce, it is advisable to configure the "Brand Field" for multi-brand setup. This configuration will eliminate the need for users to perform extra manual actions each time they use the Contact Hub. By associating brands with the "Brand Field," Jobrock can automatically display the relevant brands, streamlining the process for users.
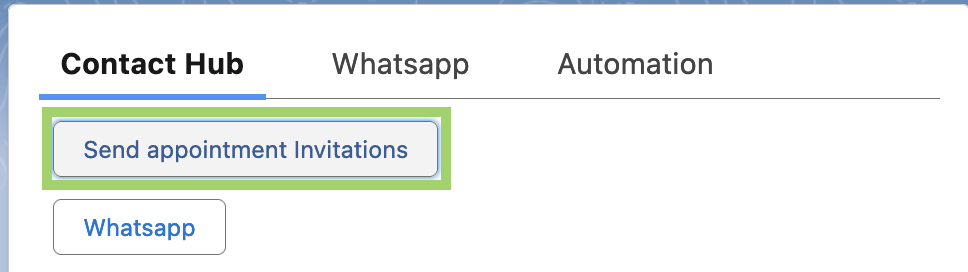
In cases where the "Brand Field" is not populated, the following flow will be triggered for each user whenever they attempt to send an appointment invitation.
The user clicks on "Send appointment invitation"
Next, the user will be prompted to select the brand.

Once the brand selection is made, the user can initiate an appointment invitation or schedule an appointment without delay.
However, if multi-brand is configured correctly, the user will be presented with the screen below, where they can immediately select and start one of the two appointment options, without the need to choose a brand beforehand.

For detailed instructions on how to configure multi-brand in the JR Contact Hub, click here.
Explore multi-brand components in relevant features
In the following list, you will find a multi-brand section on how to configure the component correctly: