Setting Up Google OAuth 2.0 for Email Sending
This article guides you through setting up OAuth 2.0 for sending emails with Gmail. Learn the steps for app registration, obtaining identifiers, generating a secure app secret, and configuring permissions.
Configure Google OAuth
Learn how to configure Google OAuth effectively with this simple guide, enabling secure access to your applications.
Step 1: Go to the Google API Console
Open a web browser and navigate to the Google API Console at https://console.developers.google.com/.
Step 2: Create a new project
Create a new project by clicking on the "Create a project" in the top bar. If you have an existing project you want to use, simply select it from the dropdown menu.
Name the new project, choose the organization and location, and then press "Create".

Step 3: Enable the Gmail APIs
In the sidebar menu, click on "Enabled APIs & Services" to access the list of available APIs.

If you don't have any APIs available to use yet, get started by searching "Gmail API" in the dropdown.
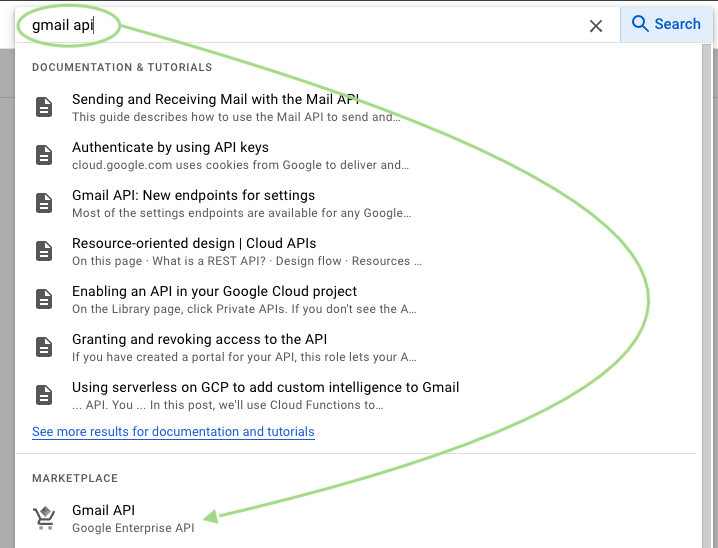
Click "Gmail API" and then hit "ENABLE".

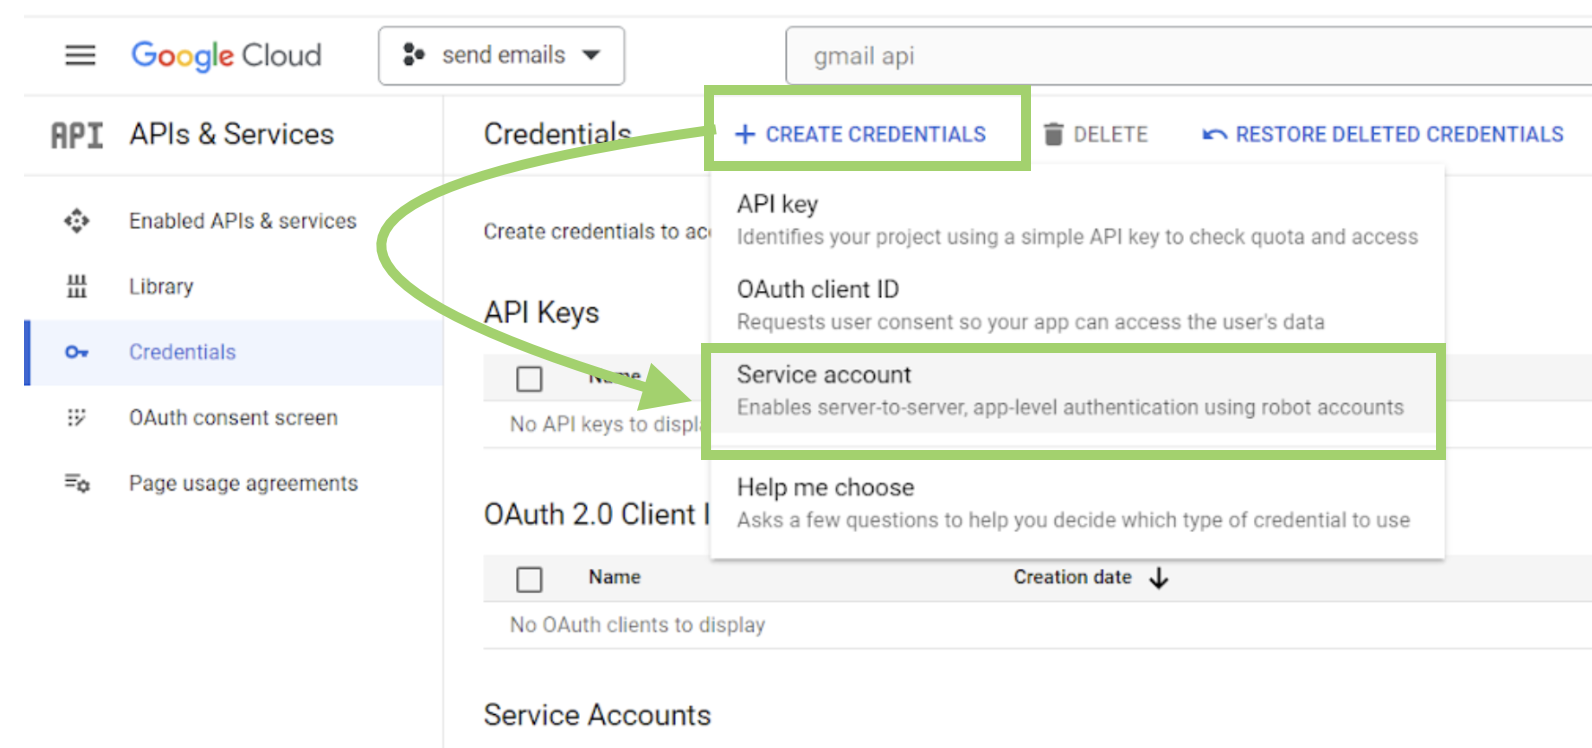
Step 4: Create a Service account
- From the sidebar menu, navigate to "Credentials."
- Click on the "Create credentials" dropdown and select "Service account."
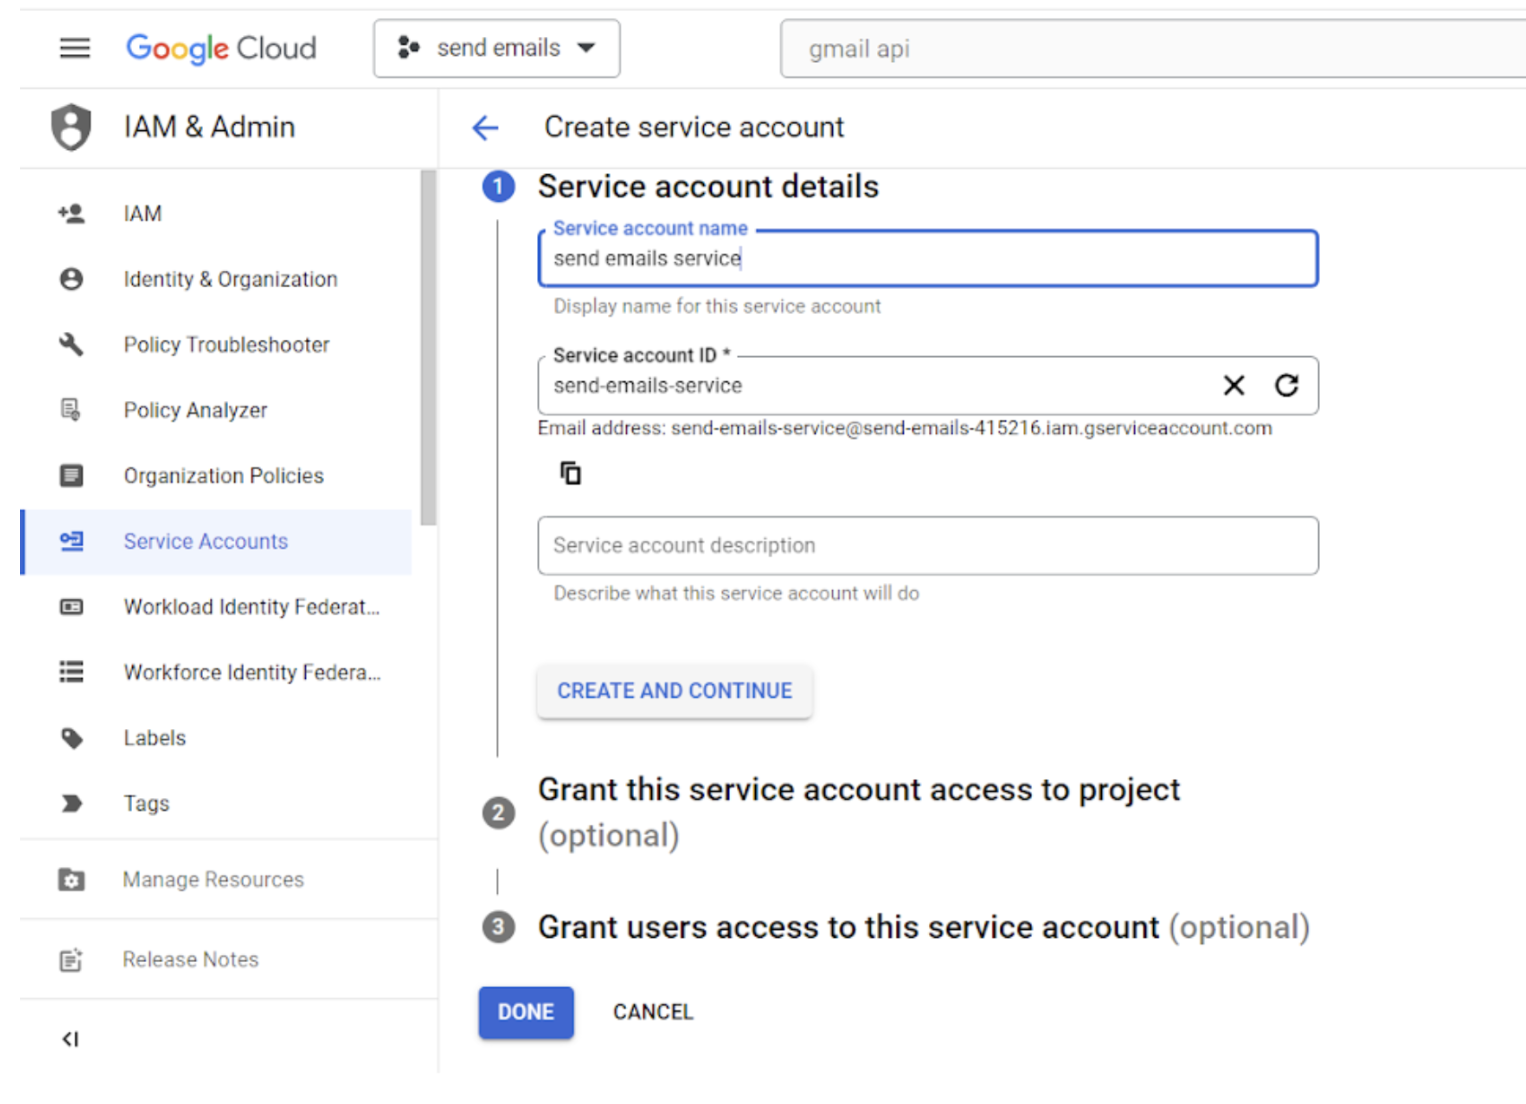
Then, follow the steps to fill out the service account name, and description, and save to continue.
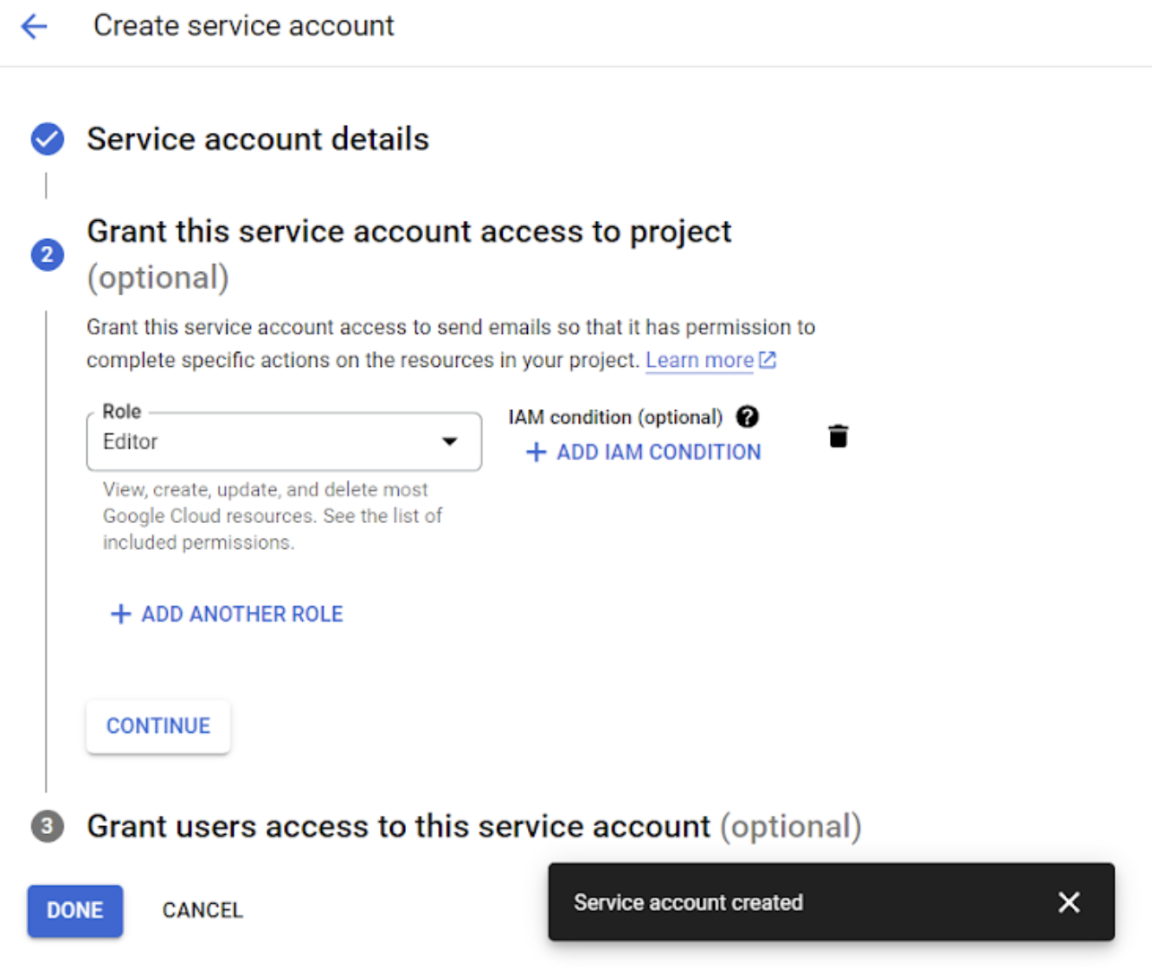
Assign the editor role to the service, then click "Continue" followed by "Done".
Step 5: Set up the OAuth consent screen
Navigate to the OAuth consent screen from the left side menu, choose "External", and proceed by clicking on "Create".

Then, provide the required information and proceed by clicking "Save and Continue".
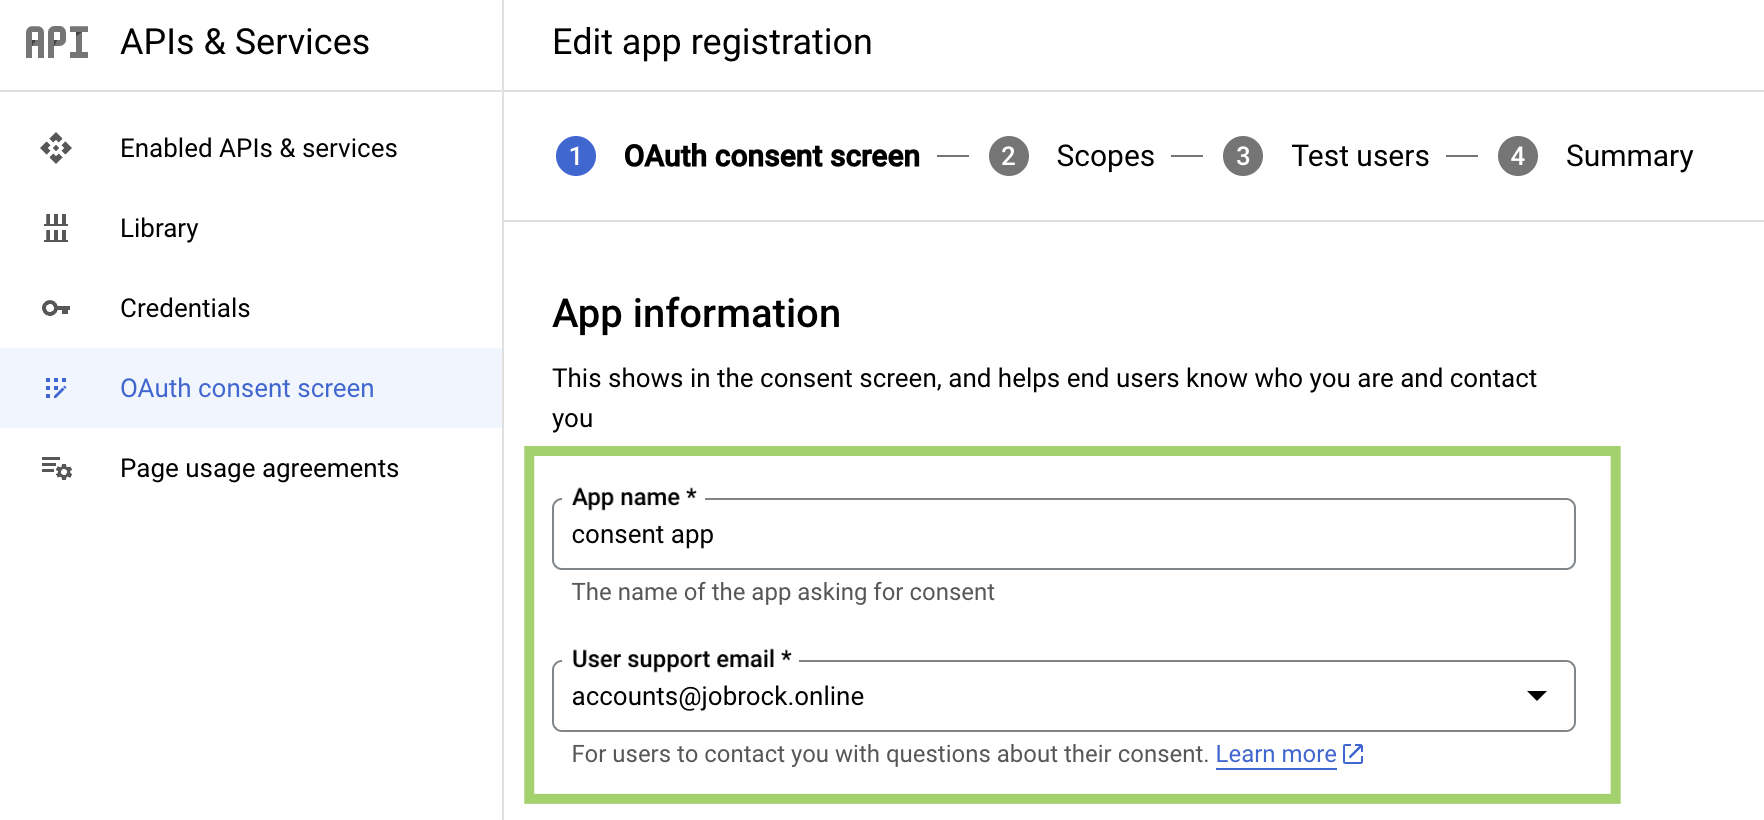
Note: You are not required to fill out the "Scopes" and "Test users" sections. You may leave these fields blank if you prefer.
Then, on the "Summary" screen, you can save your configuration by clicking on "Back to Dashboard".
Finally, publish the app on the last screen.

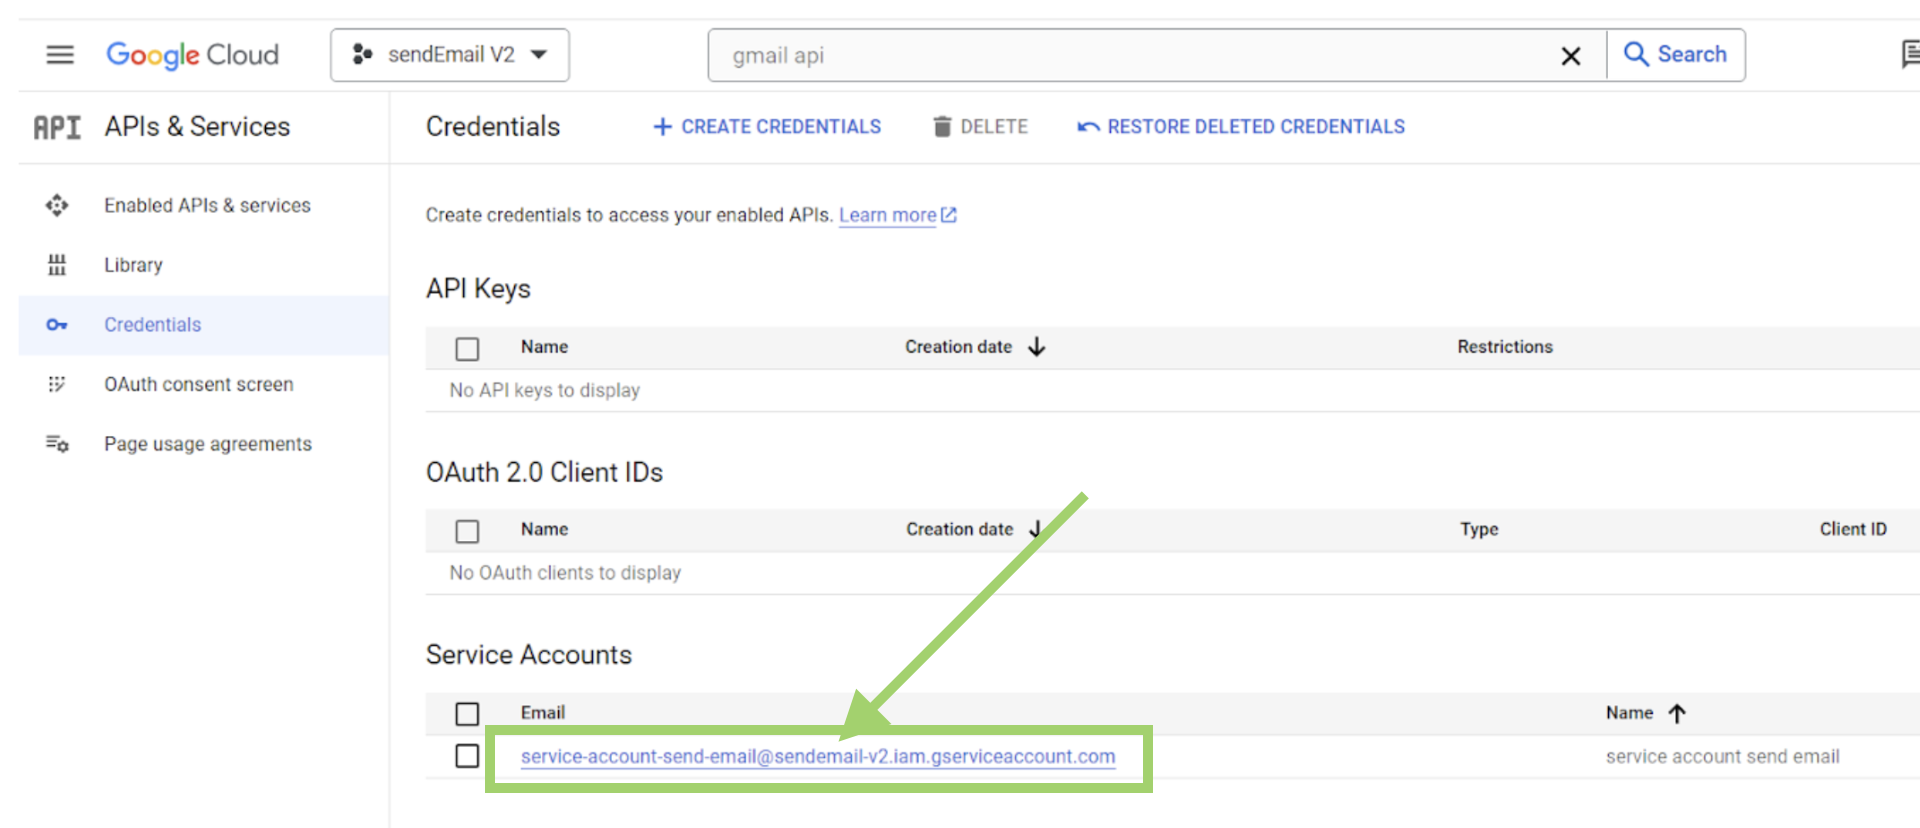
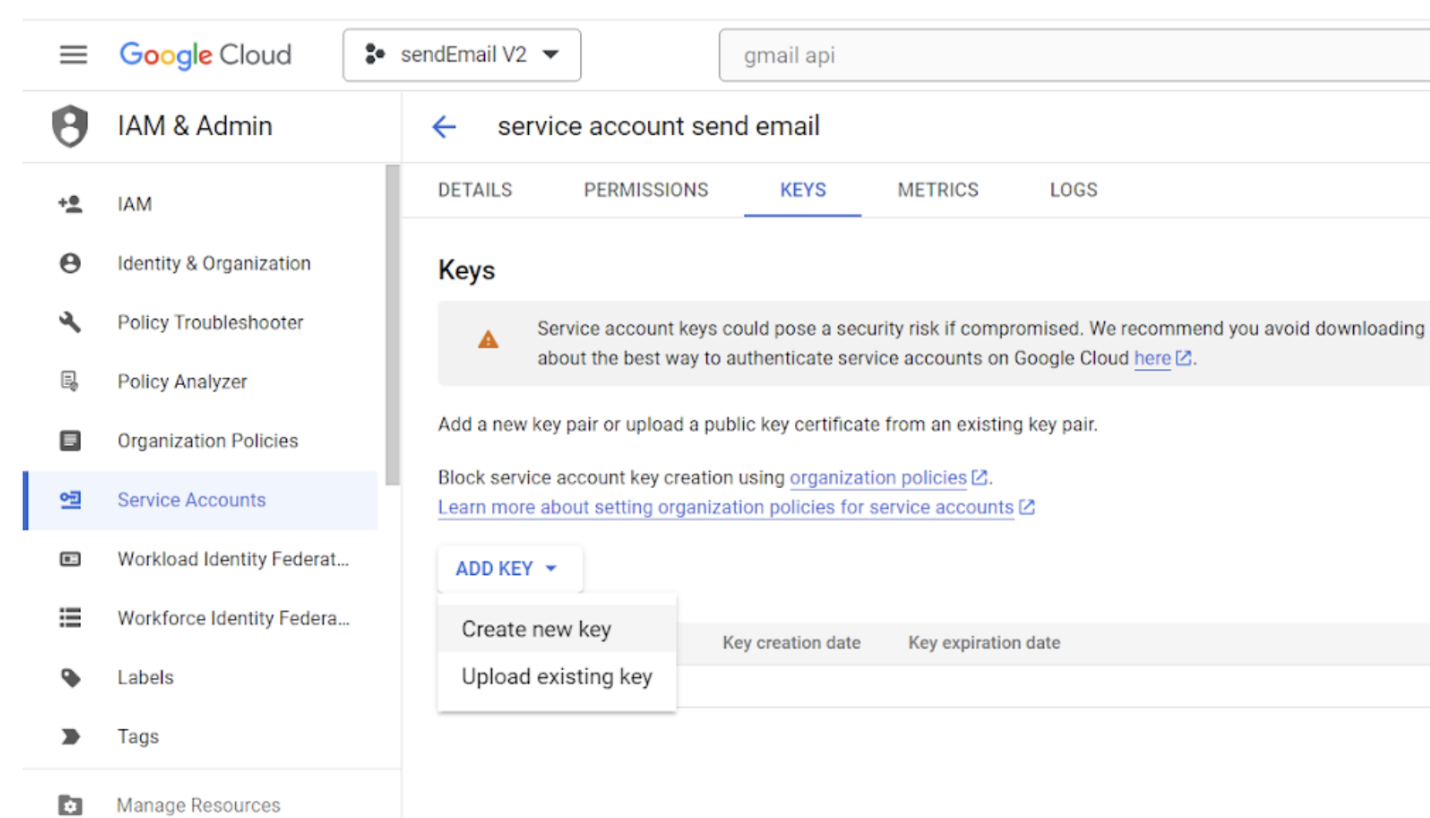
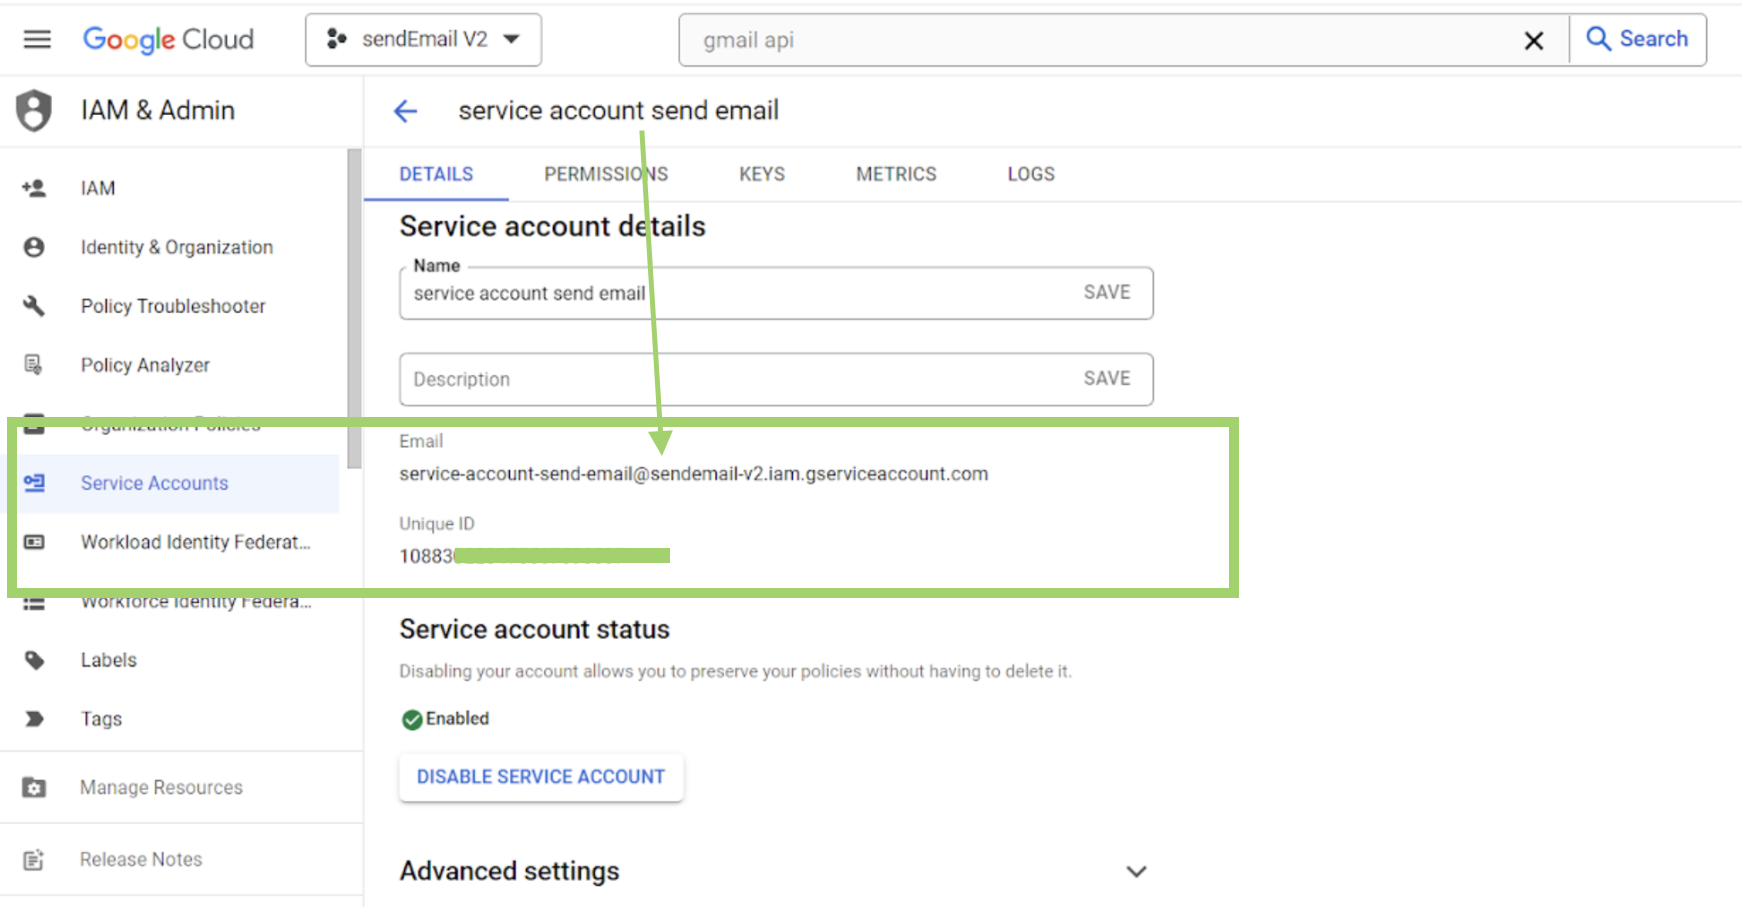
Step 6: Retrieve the client email, generate a key, and copy the private key
Click on the service account name to access the details.
Then, click "Create new key".
Select JSON format and then click on the "Create" button.
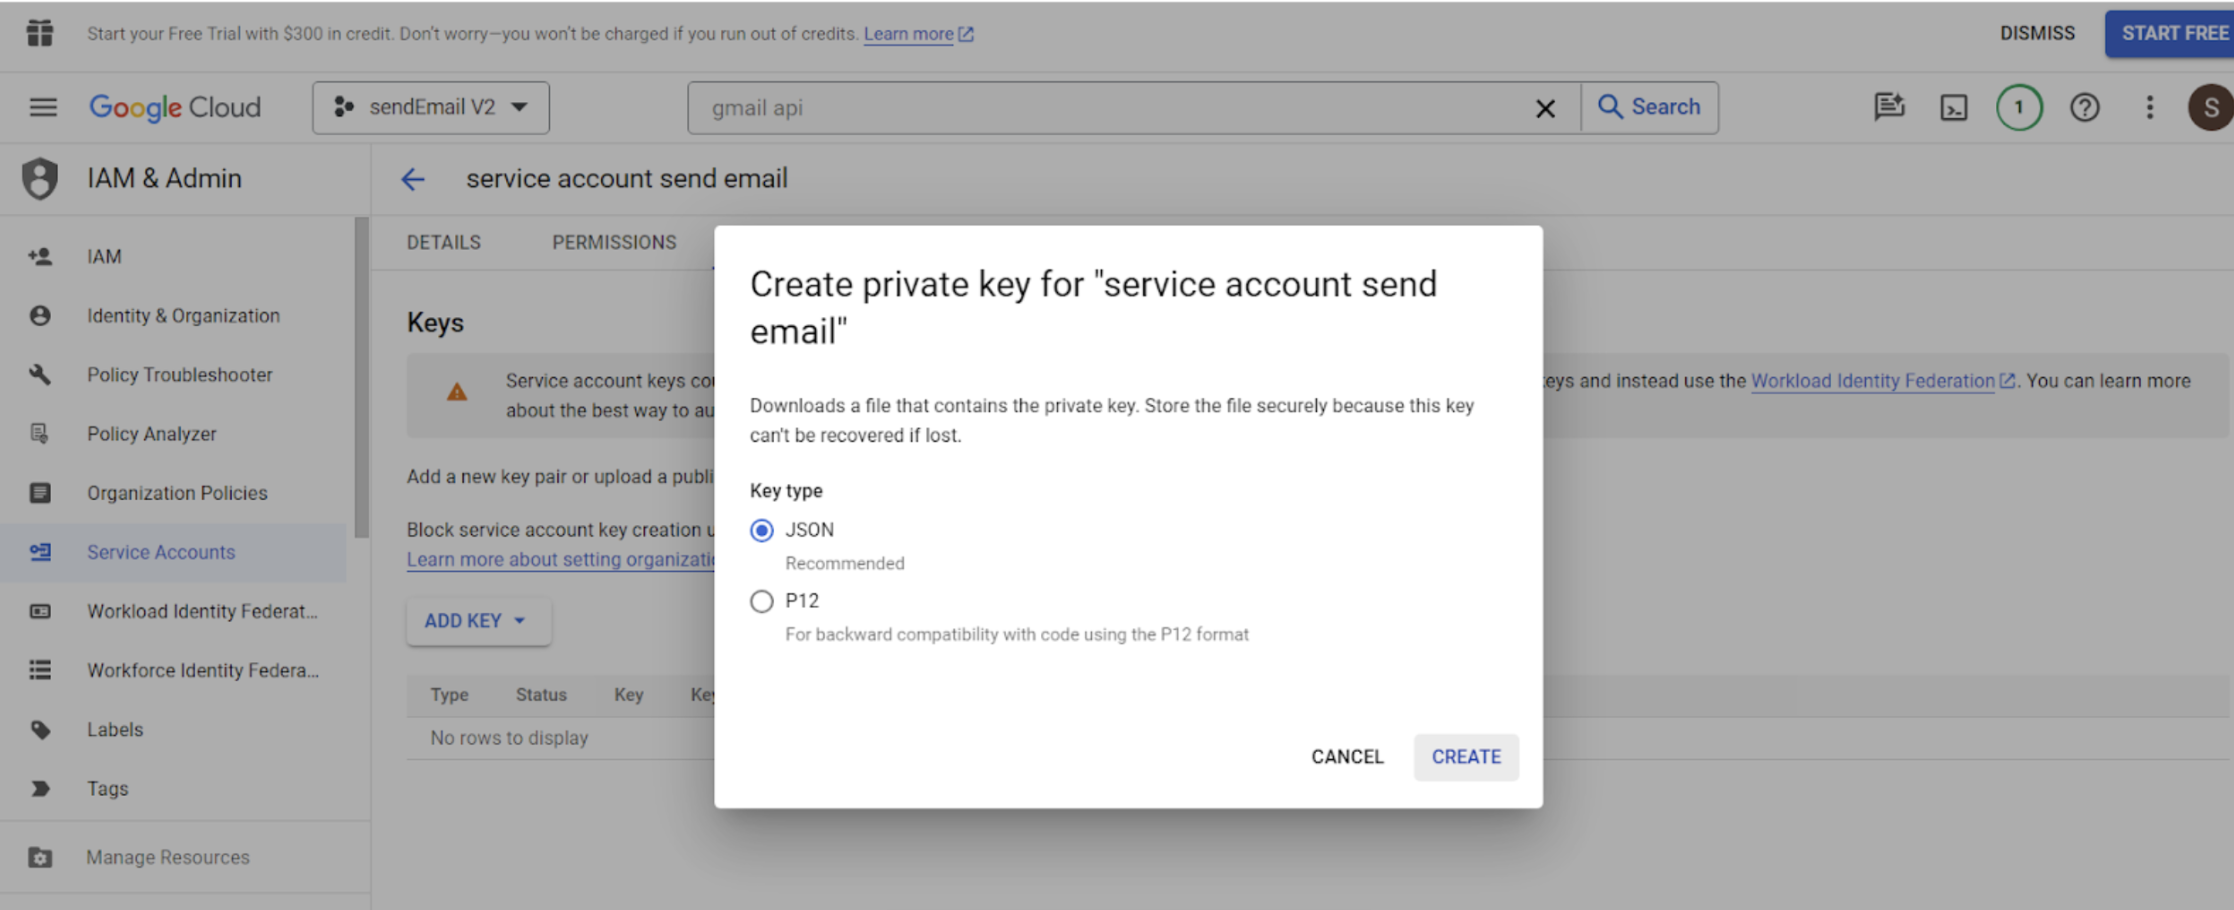
Important: The private key is saved to your computer. Open the file and copy the private key from the JSON file, which you'll require later in Jobrock.
Copy the private key:
Please copy the entire string of the "private_key" from the generated JSON file:
-----BEGIN PRIVATE KEY-----xxxxxxxxxxxxxxxxxxxxxxx-----END PRIVATE KEY-----\n
Retrieve the client email:
Example: service-account-send-email@sendemail-v2.iam.gserviceaccount.com
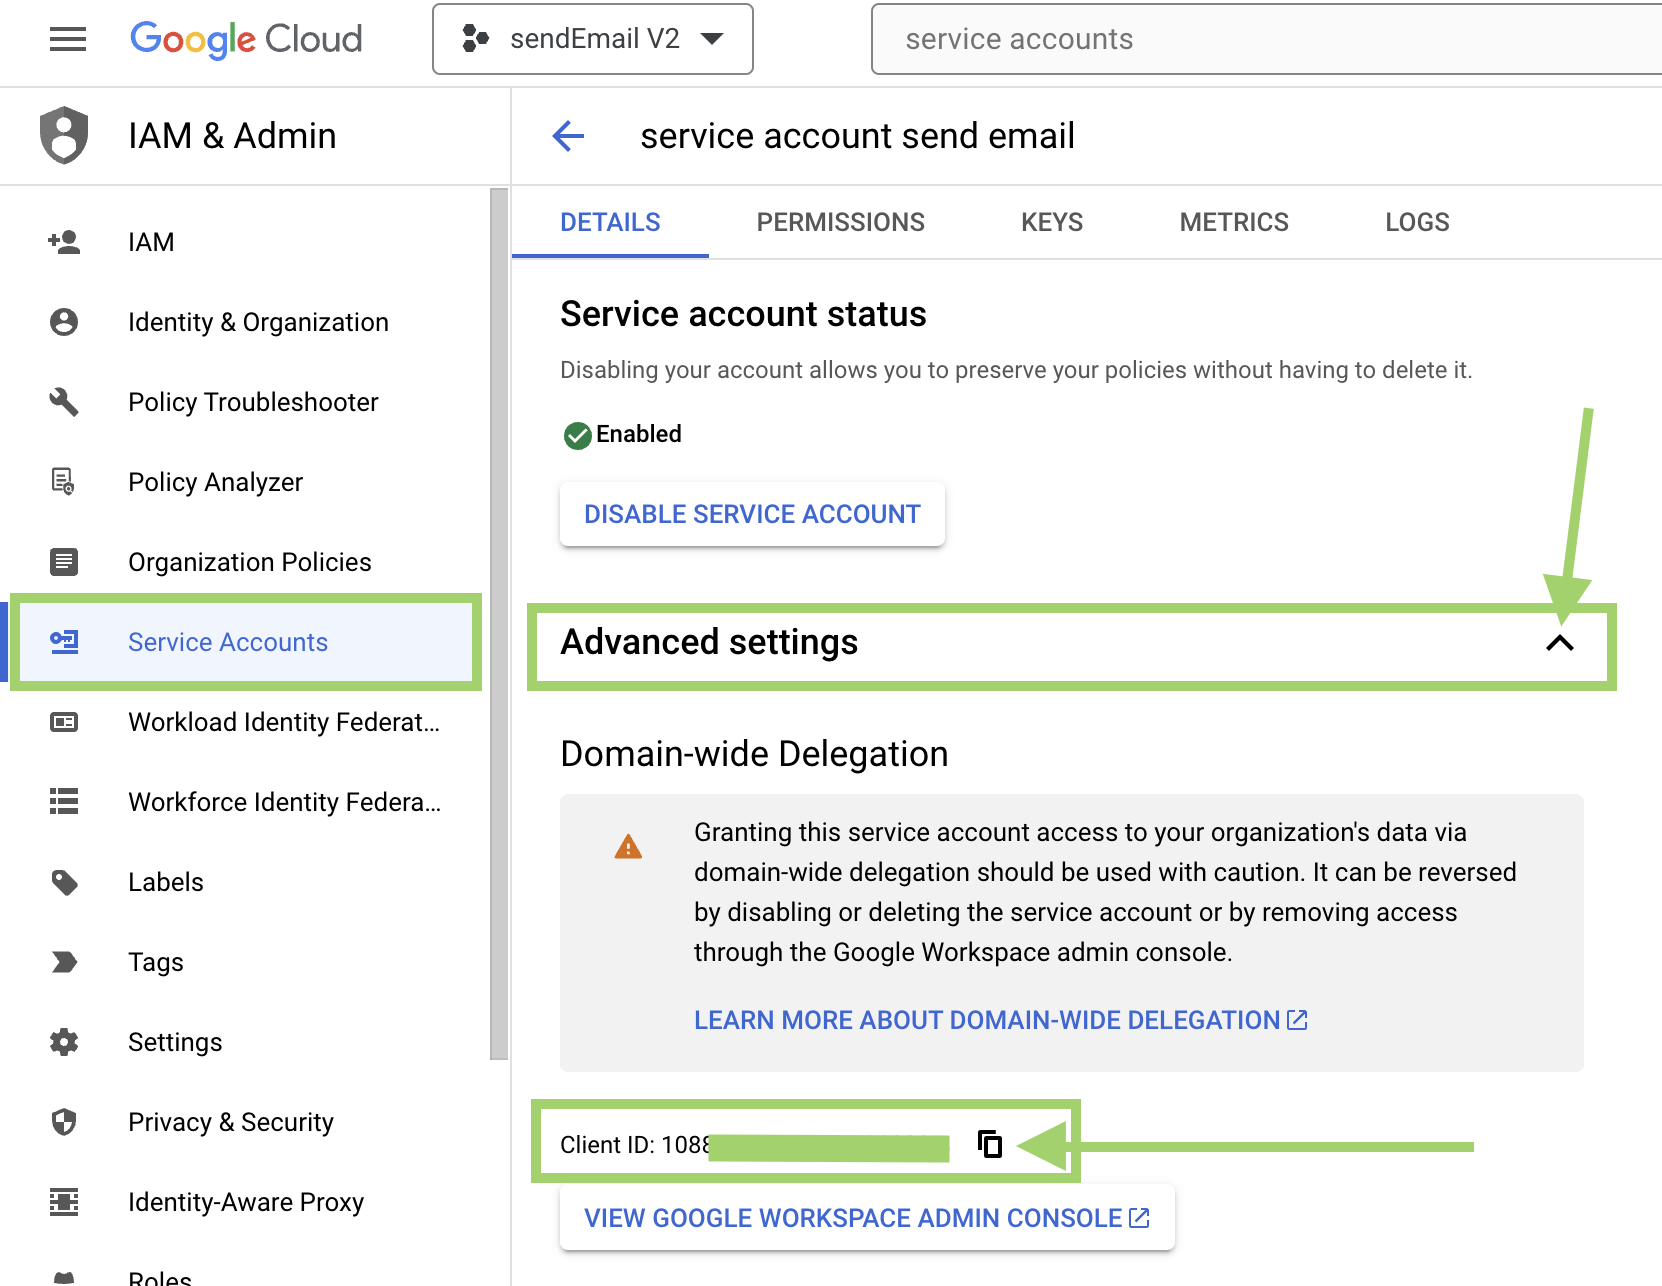
Step 7: Get the "client ID"
Navigate to advanced settings and copy the client ID.
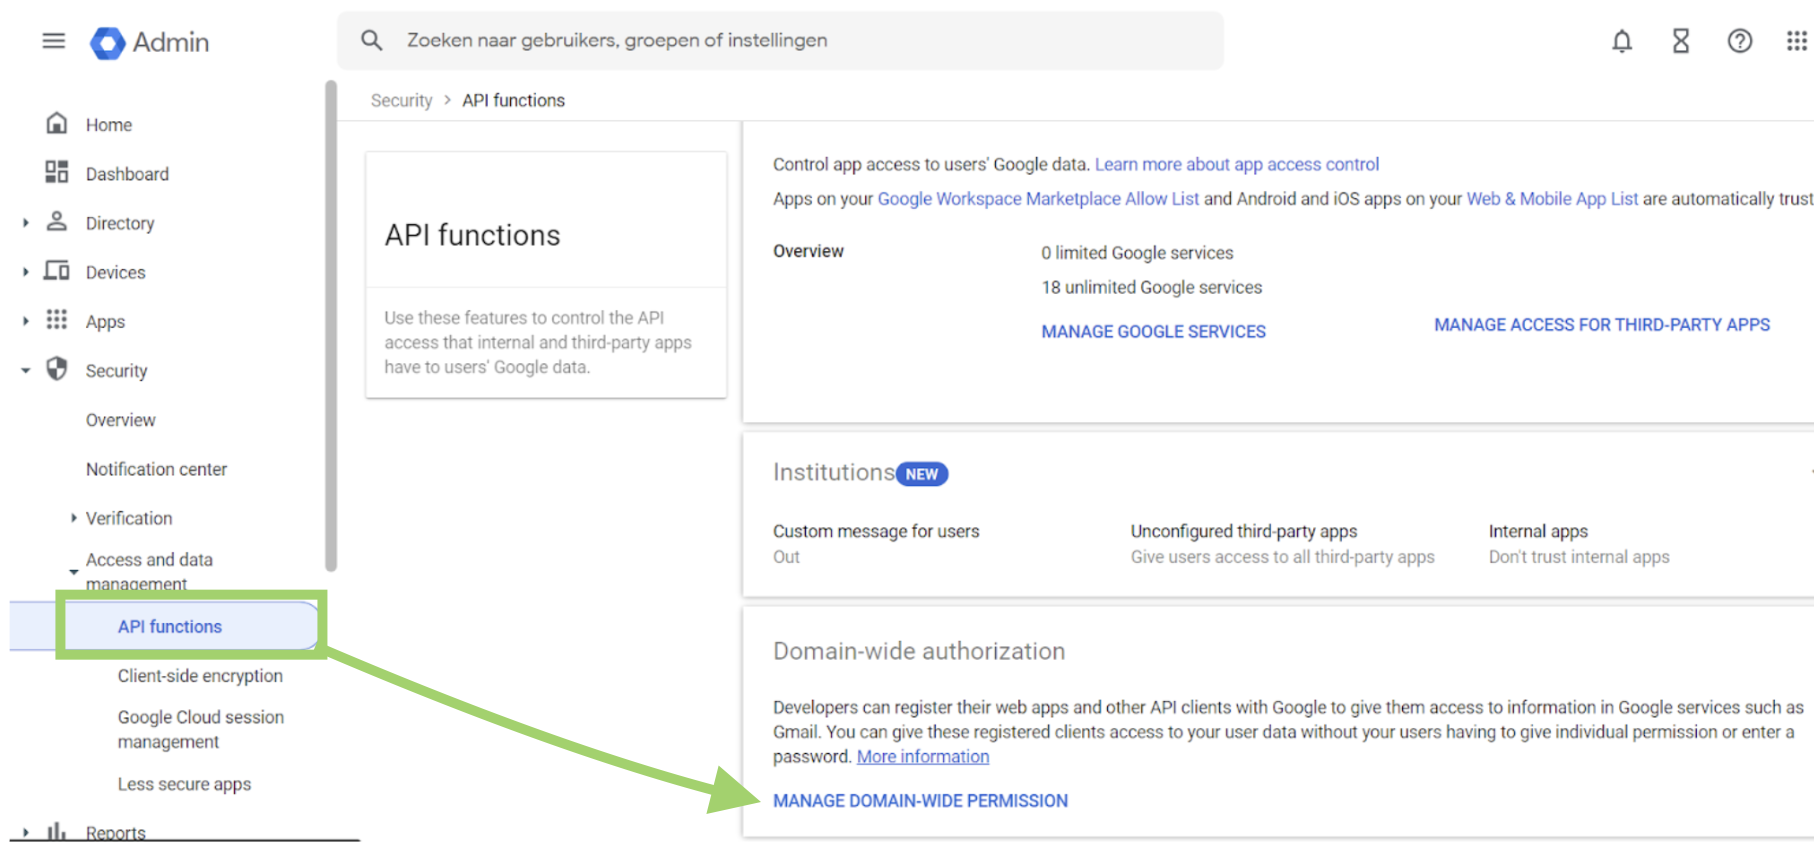
Step 8: Activate domain-wide delegation and grant permissions to access specific scopes
Go to admin to enable domain-wide-delegation for your service account:
-
Sign in to your Google Admin console.
Sign in using an account with super administrator privileges
- In the Admin console, go to Menu > Security >Access and data control> API controls>Manage Domain Wide Delegation.
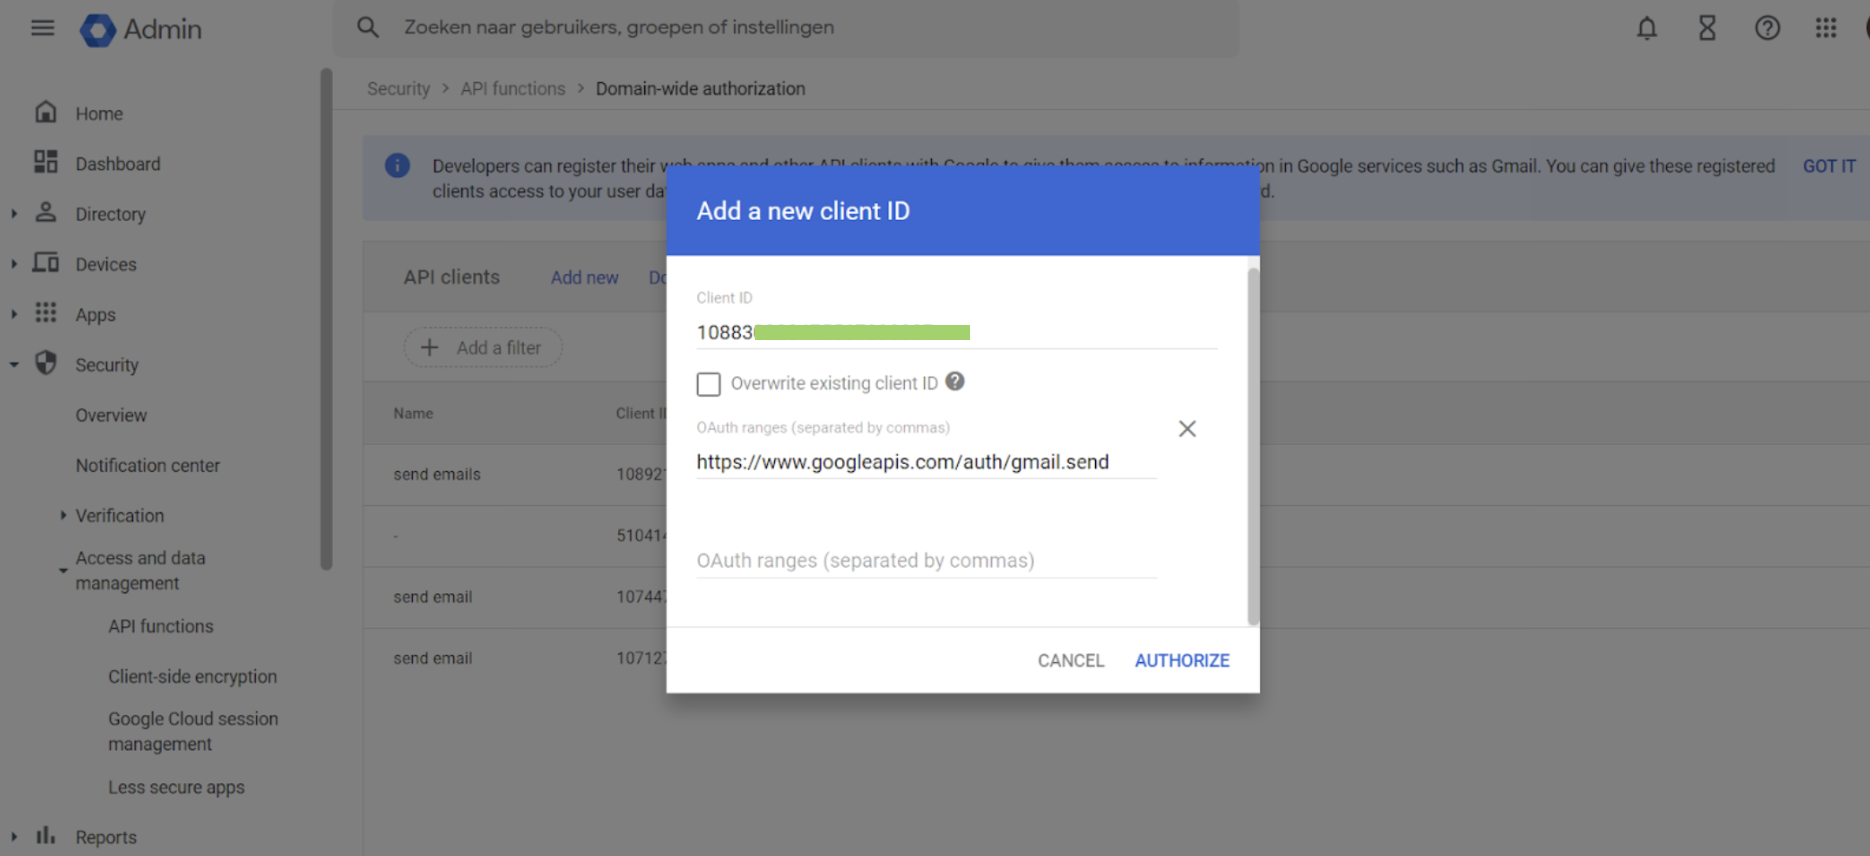
- Click Add new.
- Enter the Client ID for either the service account or the OAuth2 client.
- In OAuth Scopes, add each scope that the application can access (should be appropriately narrow). You can use any of the OAuth 2.0 Scopes for Google APIs. Enter https://www.googleapis.com/auth/gmail.send Click Authorize. If you get an error, the client ID might not be registered with Google or there might be duplicate or unsupported scopes.
You'll require the following:
- Client ID: 108830xxxxxxxxxxx
- Scope: https://www.googleapis.com/auth/gmail.send
Step 9: To set up Jobrock, you'll need:
- An email within this workspace, for example: info@jobrock.online
- Client email: send-email-service@send-emails-415216.iam.gserviceaccount.com
- The private key downloaded to your computer from the JSON file. Refer to step 6 for specific instructions on what exactly to copy.