Best practice G05 - Manually trigger a bulk automation
This article shows how to built a configuration which supports the option to manually trigger a Jobrock flow template in bulk against a set of contacts in Salesforce.
| IN THIS ARTICLE |
|---|
| Creating a custom field on the contact object |
| Creating the Salesforce flow |
| Generating a list of contact ID's |
| Bulk trigger a Jobrock flow template via import |
Overview
This documentation outlines the design and implementation of a dynamic Flow execution system that triggers the Jobrock Flow upon a custom field update on the Contact object in Salesforce.
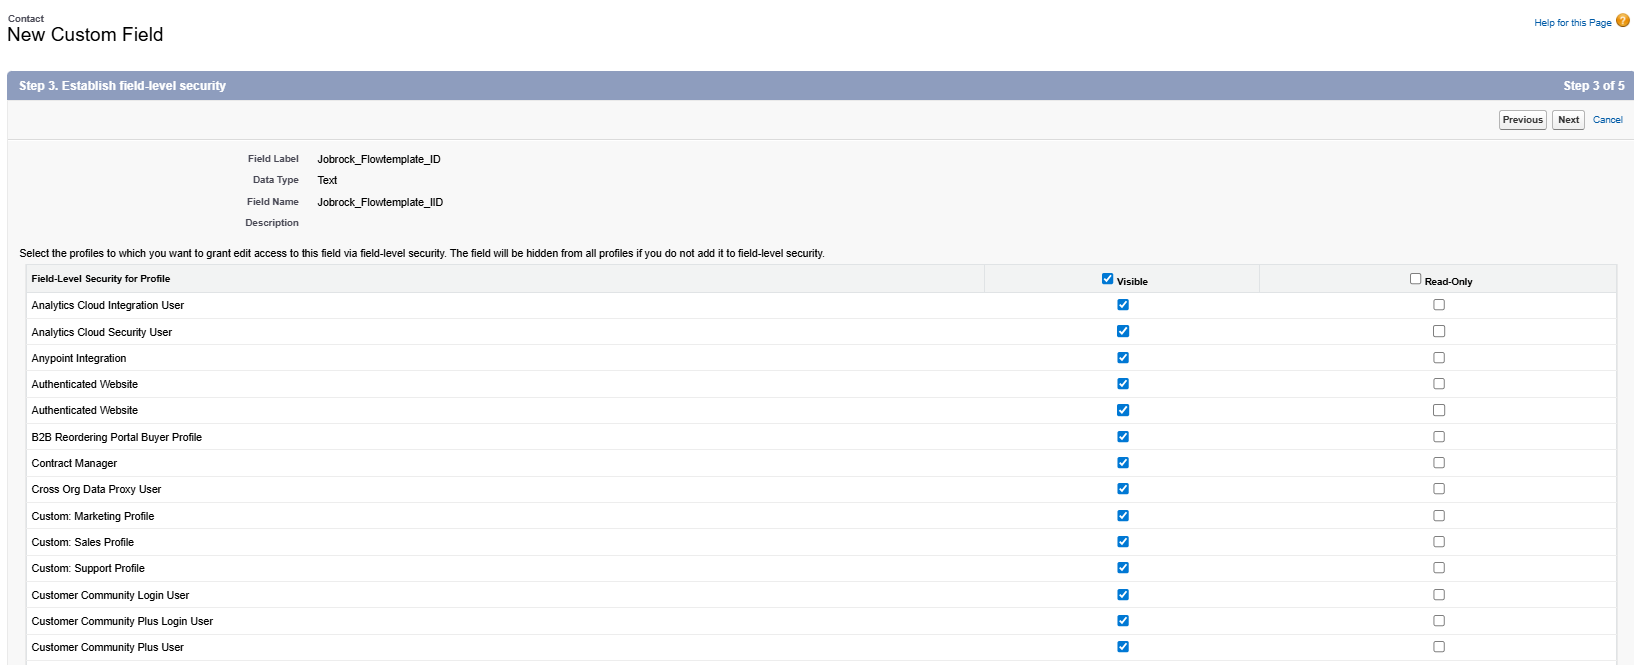
Step 1: Creating a custom field on the Contact object
- Field Name:
Jobrock Flowtemplate ID - Type: Text
- Purpose: Stores the Jobrock Flow Template ID that determines which Jobrock flow should be triggered for the Contact.
- Use Case: Populated through data import, batch updates, integrations, or automation.
- Note : While creating a Custom field make sure the visibility of field is enabled for your profile (Refer to below Screenshot).
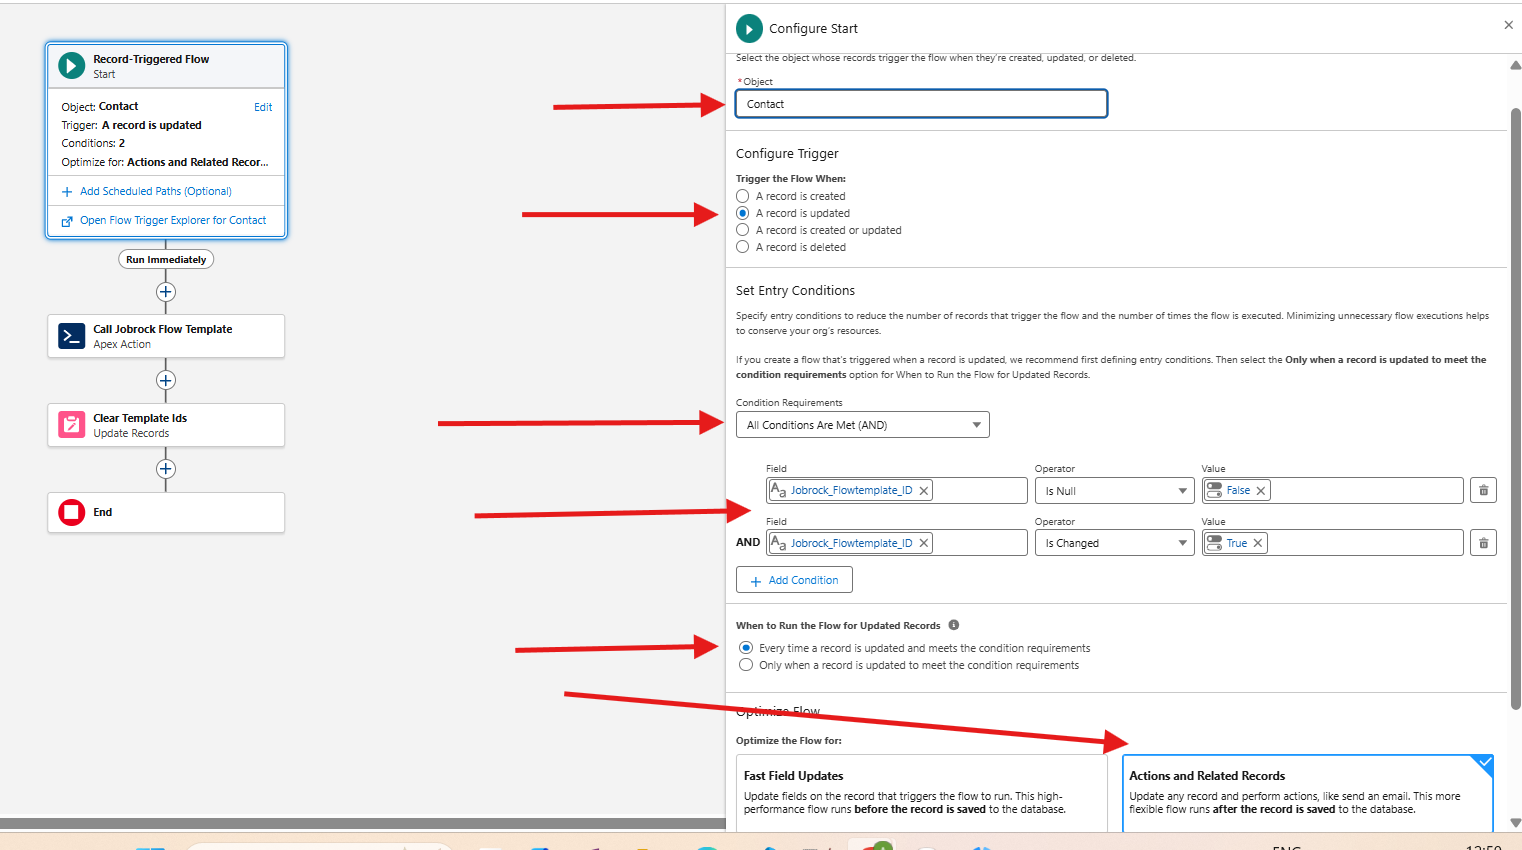
Step 2: Creating the Salesforce Flow
- Type: Record Triggered Flow
- API Name:
Contact_Dynamic_Flow_Call - Trigger: Fires when the
Jobrock_Flowtemplate_ID__cfield is updated. - Purpose: Captures the updated record’s ID and Flow Template ID, then invokes a custom Apex action to initiate the desired flow.
- Apex Action : Calls the apex class
SendAutomationAppointmentswhich accepts following params.
| Parameter | Value |
| Configuration Id | Jobrock Flow Template ID |
| Object Type | Contact |
| Record Ids | Ids of the triggering contacts |
| Client Code | Client Code (This is required only if the Multi Branded Setup is enabled in your Org) |

Step 3: Generating a list of contact ID's
- Prerequisites
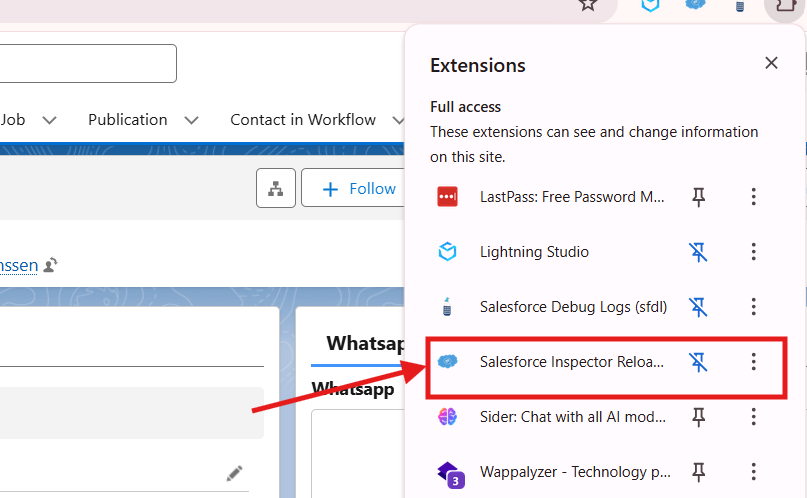
- Google Chrome browser
- Salesforce Inspector extension installed:
- If Salesforce Inspector not Installed. Install from Chrome Web Store: Salesforce Inspector.
Steps to Export Contact IDs
1. Log in to Salesforce
- Open Salesforce in Chrome and log in to your org.
2. Open Salesforce Inspector
- Click the Salesforce Inspector icon in the Chrome toolbar.
- A small panel will appear on the right side of the screen.
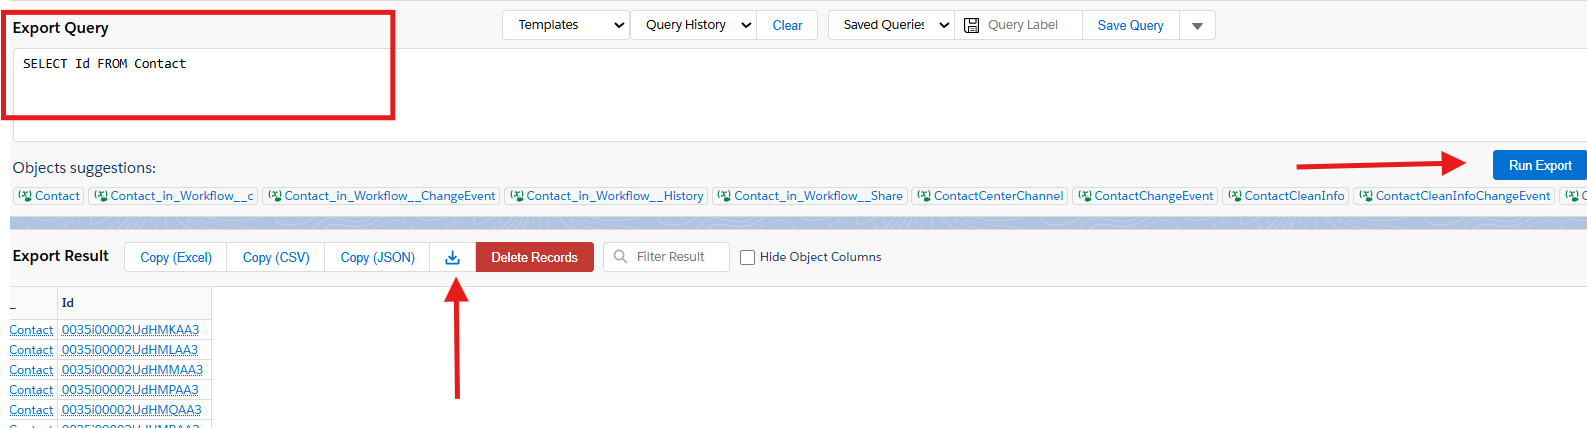
3. Click “Data Export”
- In the Salesforce Inspector panel, click “Data Export”.
4. Enter SOQL Query to Export Contacts
- In the query box, enter the following:
SELECT Id FROM Contact
- This query will return the Contact IDs.
- You can filter the query as per your Need. See documentation here.
5. Run the Query
- Click the “Run Export” button.
-
Download the Result
- Once results load, click “Download” to save the data as a
.csvfile.
Step 4: Bulk triggering a Jobrock flow template via data import
After exporting your Contacts using Salesforce Inspector, you can also use it to bulk update Jobrock_Flowtemplate_ID__c field safely and easily.
Steps to update the flow template ID
-
Prepare Your Updated Data
- Open the
.csvfile you exported earlier. - Update the
Jobrock_Flowtemplate_ID__ccolumn with the Jobrock Flow TemplateID.- Do not change the
Idcolumn — this tells Salesforce for which contact flow template ID should be added to the custom created field (step 1).
- Do not change the
Here is an example of how th csv file could look like:
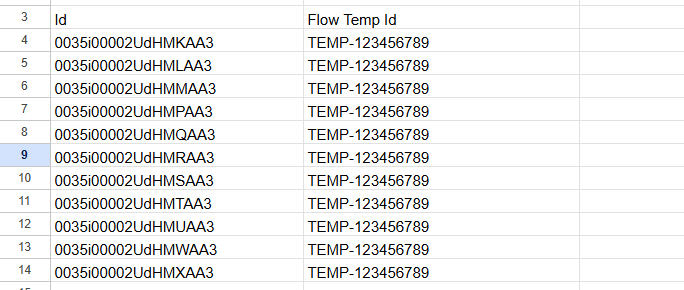
NOTE: Always use the same Flow template ID in one batch. Do not update different flow template ID for different contacts in one upload!
- Save the updated file as a
.csv.
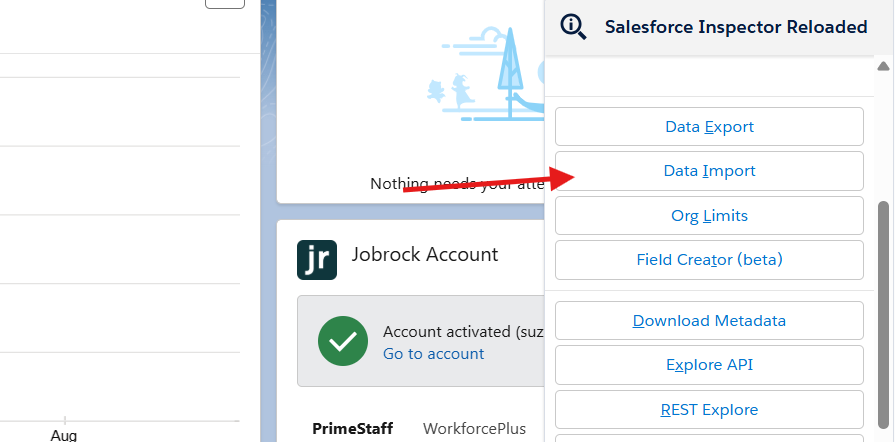
2. Open Salesforce and Launch Inspector
- Go to any Salesforce page in Chrome.
- Click the Salesforce Inspector icon.
- Click on "Data Import" from the panel.
3. Paste or upload the updated data
- In the Data Import window:
- Action :
Update - Object :
Contact - Data : Copy the table from excel file and paste it directly into the text area(Paste Excel data here).
- Prepare the Field Mappings properly (As shown in below Image).
- Action :
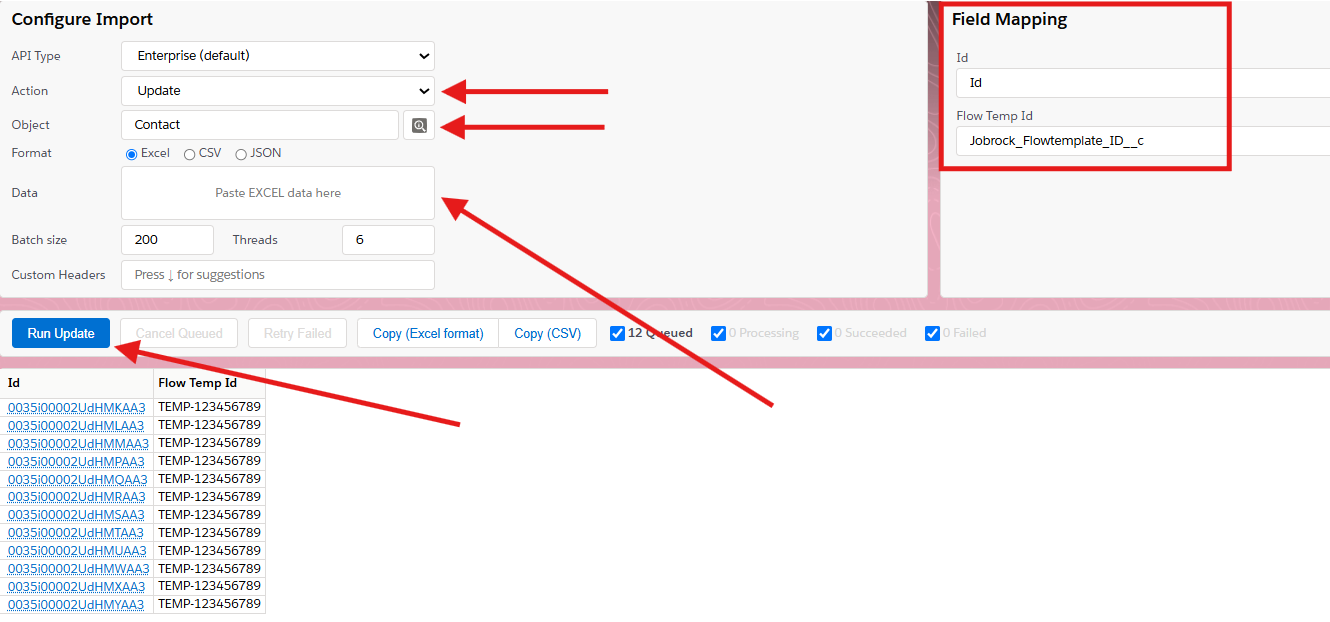
4. Run Update
- Click the "Run Update" button to update the records.
- You'll see a success message for updated Contacts.
✅ All set! Contact updates have been applied and the Jobrock flow template has been triggered for the selected contacts!