How to add a new media classification?
The use of media classifications will enable the possibility to use dynamic videos in automations or WhatsApp templates. By creating a media classification a media placeholder will be created in the profile of each Jobrock user. This article explains how to create a new media classification in Jobrock.
| IN THIS ARTICLE |
|---|
| Why should we use media classifications and where to use them? |
| Where to create media classifications? |
| How to create a media classification? |
Why should we use media classifications and where to use them?
A media classification is nothing more than a 'card' you can create as an admin in the profile of each Jobrock users. This 'card' can contain instructions, an example video and the possibility for each user to upload their own video for that classification.
Once a media classification is created you can select this for example in automations or WhatsApp templates. By configuring a media classification you can use one automation or WhatsApp template and dynamically replace the default video by a user video.
In this article we use the example of a birthday message to contacts. By creating a media classification you will be able to create one WhatsApp message triggered to each contact which has his/her birthday with a personal video of their linked recruiter/ jobrock user.
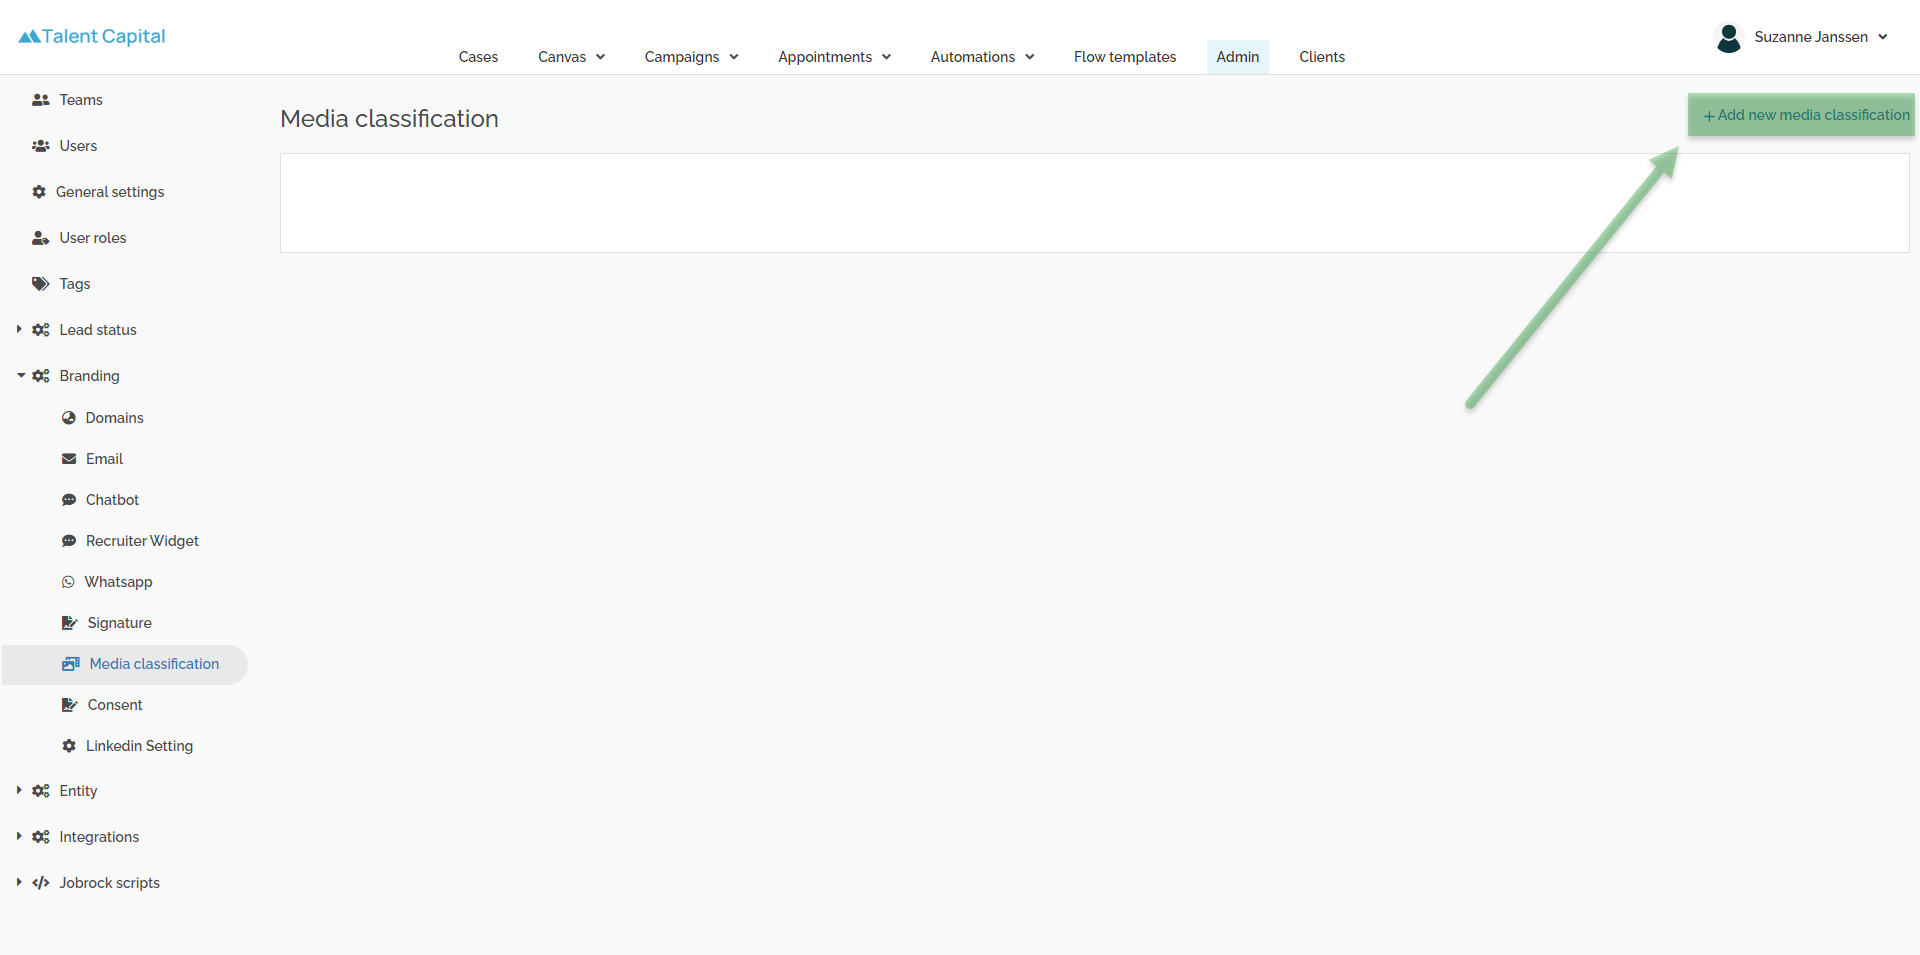
Where to create media classifications?
Go to the Media classification screen in te Jobrock admin module via Admin > Branding > Media classification.

How to create a media classification
-
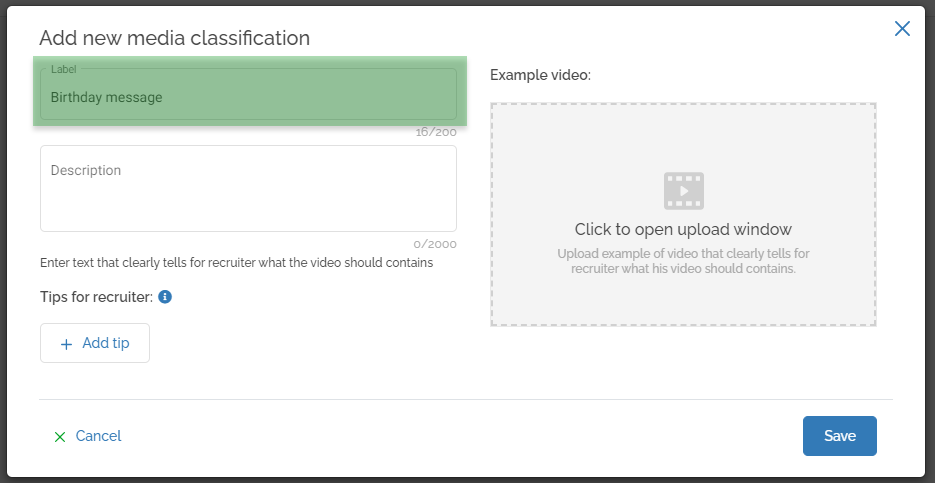
Click Add new media classification in the top right corner. A pop-up will open to define the details for the media classification.
-
Enter a label for your media classification
The label will be visible in the list of media classifications, in the profile of Jobrock users and when selecting the media classification for use in WhatsApp templates or automations. This is an internal title and contacts or candidates will not see this.
Example: for our example we use "Birthday message" as the label of our media classification.
Adding a label to your media classification. -
Enter a description for your media classification
The description can be used to explain what the media classification is for. Also this offers you as an admin or marketeer the option to explain how this media classification is used and what you need from the recruiter/ user. You can also use this to communicate a video script.
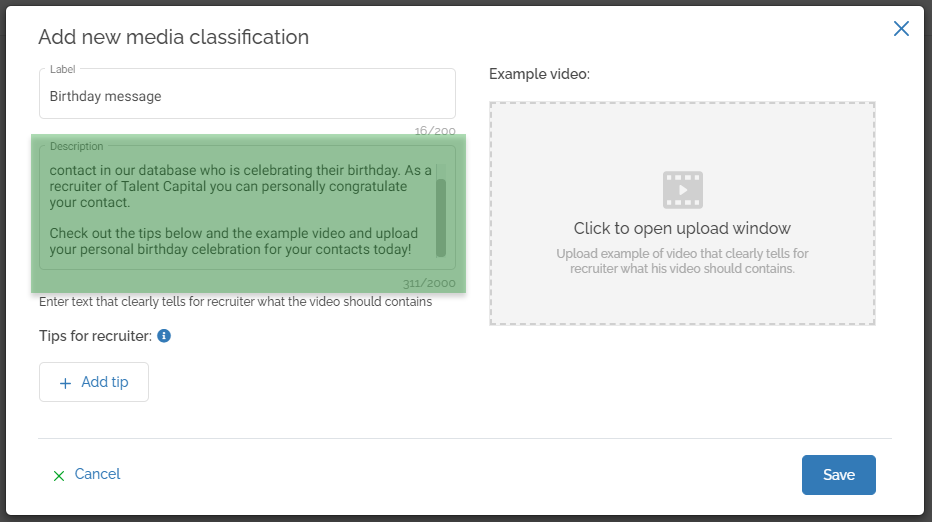
Add e description to the media classification. -
Add tips for the user
After explaining where and how the video will be used there's an option to give tips to the recruiter/ Jobrock user. Think about tips on how to create the video, but also maybe mandatory sentences you want the recruiter/ user to include in the video.

-
Upload an example video
The last step (optional) is to upload an example video for the media classification. This video can show the recruiter/ user an example. Make sure this video follows the guidelines specified in the description and tips of the media classification.
Click in the video window to select a video which is already in the library or to upload a new video from a local machine.

-
Save the media classification
Click the Save button to confirm the configuration and to create the media classification.
From this moment each user will be able to see this media classification in their Jobrock profile and upload their personal video into this media classification.
Via the 3 dots behind the classification you can easily edit the media classification.


