How to create a new Jobrock child environment?
This guide explains the procedure to set-up a new Jobrock child environment.
| IN THIS ARTICLE |
|---|
| Requesting a new Jobrock child environment |
| Configuring the new Jobrock child environment |
| Extra chapter: Setting up ATS configuration in Jobrock |
Requesting a new Jobrock child environment
To set-up a new Jobrock child environment please follow the steps below:
-
Request a new Jobrock child environment
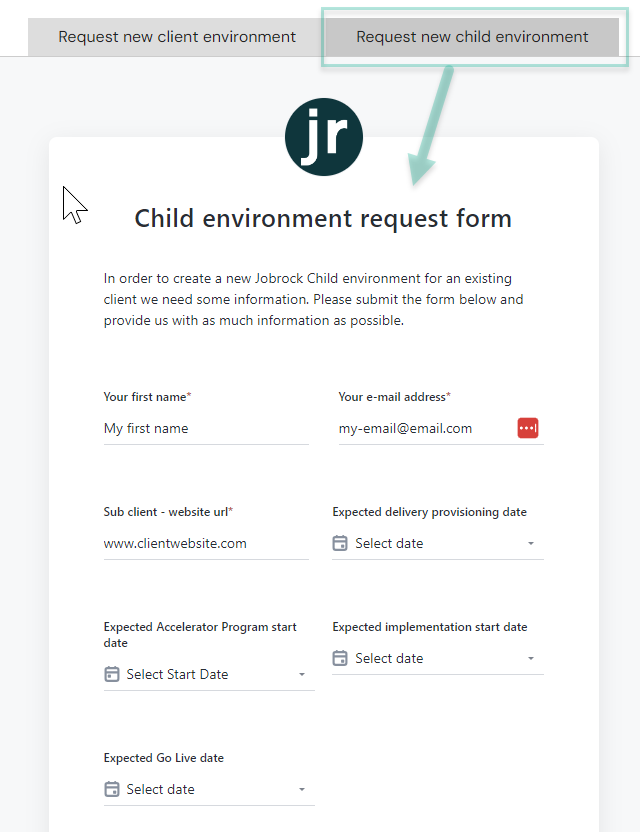
To request a new Jobrock child environment, please navigate to the Child environment request form via: https://www.jobrock.com/new-jobrock-client and select the "Request new child environment" tab.
-
Fill out the form:
Enter your name, e-mailaddress and client website url. Dates regarding provisioning, Jobrock accelerator program, implementation and go-live are optional.
Enter a Jobrock client code from a Jobrock environment which you want to use as basis for your new child environment and select whether job publication needs to be activated or not.
Also provide us with the client code and name of the Parent environment and specify the subbrand information. Please make sure you use the correct spelling of the new sub client name.
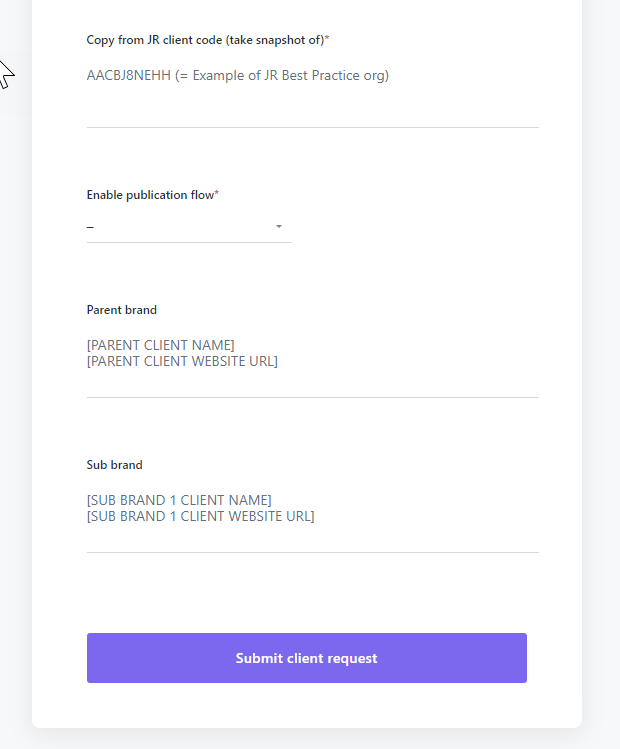
- Click Submit client request to send the child environment request form.


TIP: Creating the Jobrock environment will take a maximum of 3 working days. Keep this in mind for your planning/ go-live date.
Once the Jobrock child environment is created, Jobrock will inform you via e-mail with the following details:
- Jobrock client code for the new environment
- Jobrock admin credentials
Configuring the new Jobrock child environment
Once you have received the details from Jobrock you will need to activate this new environment in your Salesforce configuration. Follow the steps below:
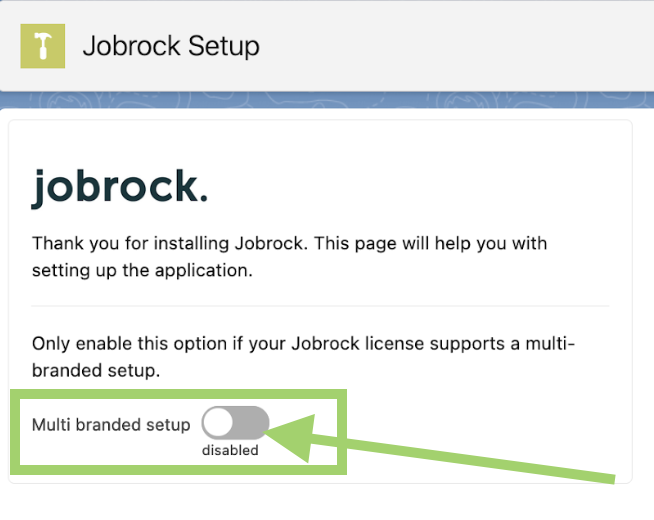
Step 1: Go to the Jobrock Setup page in Salesforce
Find the Jobrock Setup option within the Apps dropdown menu.

Step 2: Enable multi-brand set-up
If it is not enabled, switch the "Multi-branded setup" toggle to the enabled position.
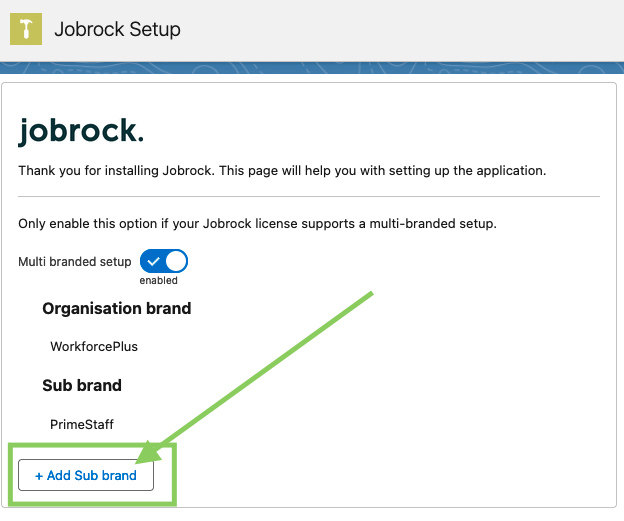
Step 3: Add a new sub-brand
Create a new sub-brand by clicking on the button depicted below.
Step 4: Enter "Verification" details
In the verification section, include the details provided by Jobrock, such as:
- Company Name: Enter the client code received from Jobrock here
- Company Code: Enter the client code received from Jobrock here
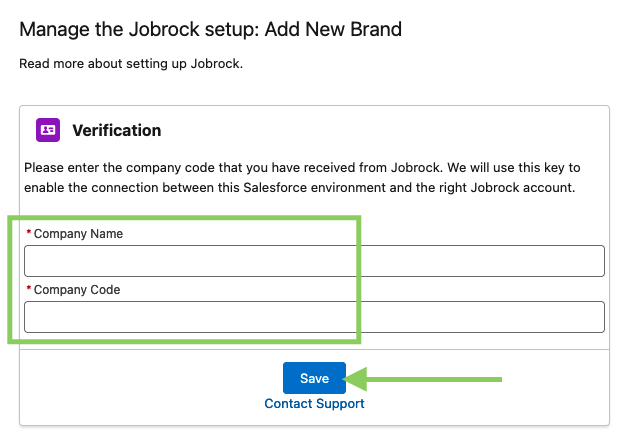
Note: Both the 'Company Name' and 'Company Code' fields should have the same input, which is the client code you received from Jobrock.
Step 5: Save the configuration
Save the newly added sub-brand by clicking 'Save'.
Extra chapter: Setting up ATS configuration in Jobrock
This final step must be carried out by a logged-in Salesforce admin SSO user.
Navigate to the Jobrock admin panel, then proceed to Integrations and select ATS. Ensure to follow steps 1 through 5.
Note: It is crucial to input identical details in step 3 - ATS settings as those entered in the parent or any other pre-existing child environments. Make sure that the API username and password, and optionally the token, match those of the other existing environments. Failure to do so results in triggering an "invalid grant" error.

For further information and a comprehensive guide that leads you through steps 1 to 5, please refer to the guide provided here.