How to Create an Unknown Automation Flow Template
This article provides an in-depth guide on integrating unknown automation with a flow template in Jobrock. It covers the step-by-step process for configuring and testing the setup.
Step-by-step guide
Follow this step-by-step guide to effortlessly navigate through the process of creating an 'Unknown Automation' flow template.
Step 1: Create an Automation
Begin by creating the automation you plan to use in your flow template configuration. If you've already created an automation, feel free to skip this step.
Otherwise, go to the "Automations" dashboard and click "+ New automation".

Once you've created your automation, don't forget to save and publish it before moving on to the next step.
Step 2: Create a new Flow Template
Navigate to "Flow templates" from the menu bar and click "+ New basic template".

Step 3: Name your Template
Add a descriptive name to your template for easy identification.

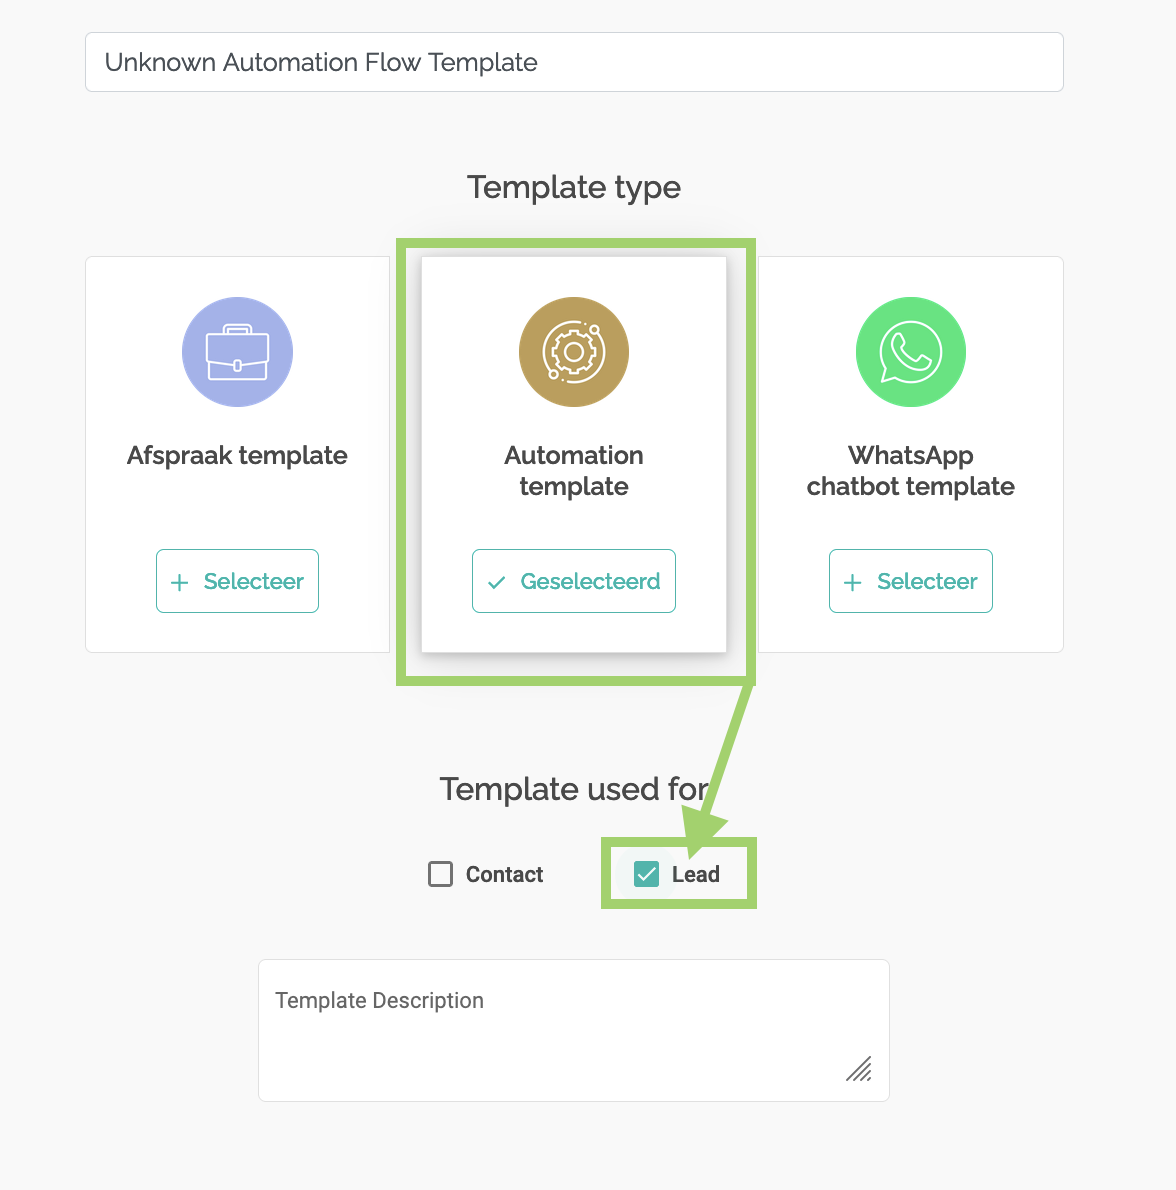
Step 4: Select Template & Lead Type
Choose the "Automation template" option and ensure to tick the "Lead" checkbox in the 'Template Used For' section. Then click "Next".
Step 5: Select Unknown Automation Lead Type
Choose 'Unknown Leads' as the automation type and click "Next".

Step 6: Add Template Mapping
Set up your template mapping by choosing the appropriate Facet name and Facet list value. For instance, if you create a field on the Job object named "Automation type" and select the picklist value "Unknown automation flow", this configuration will make the unknown automation available in the Hub for all Jobs that align with these settings.
Save your settings by clicking "Next".

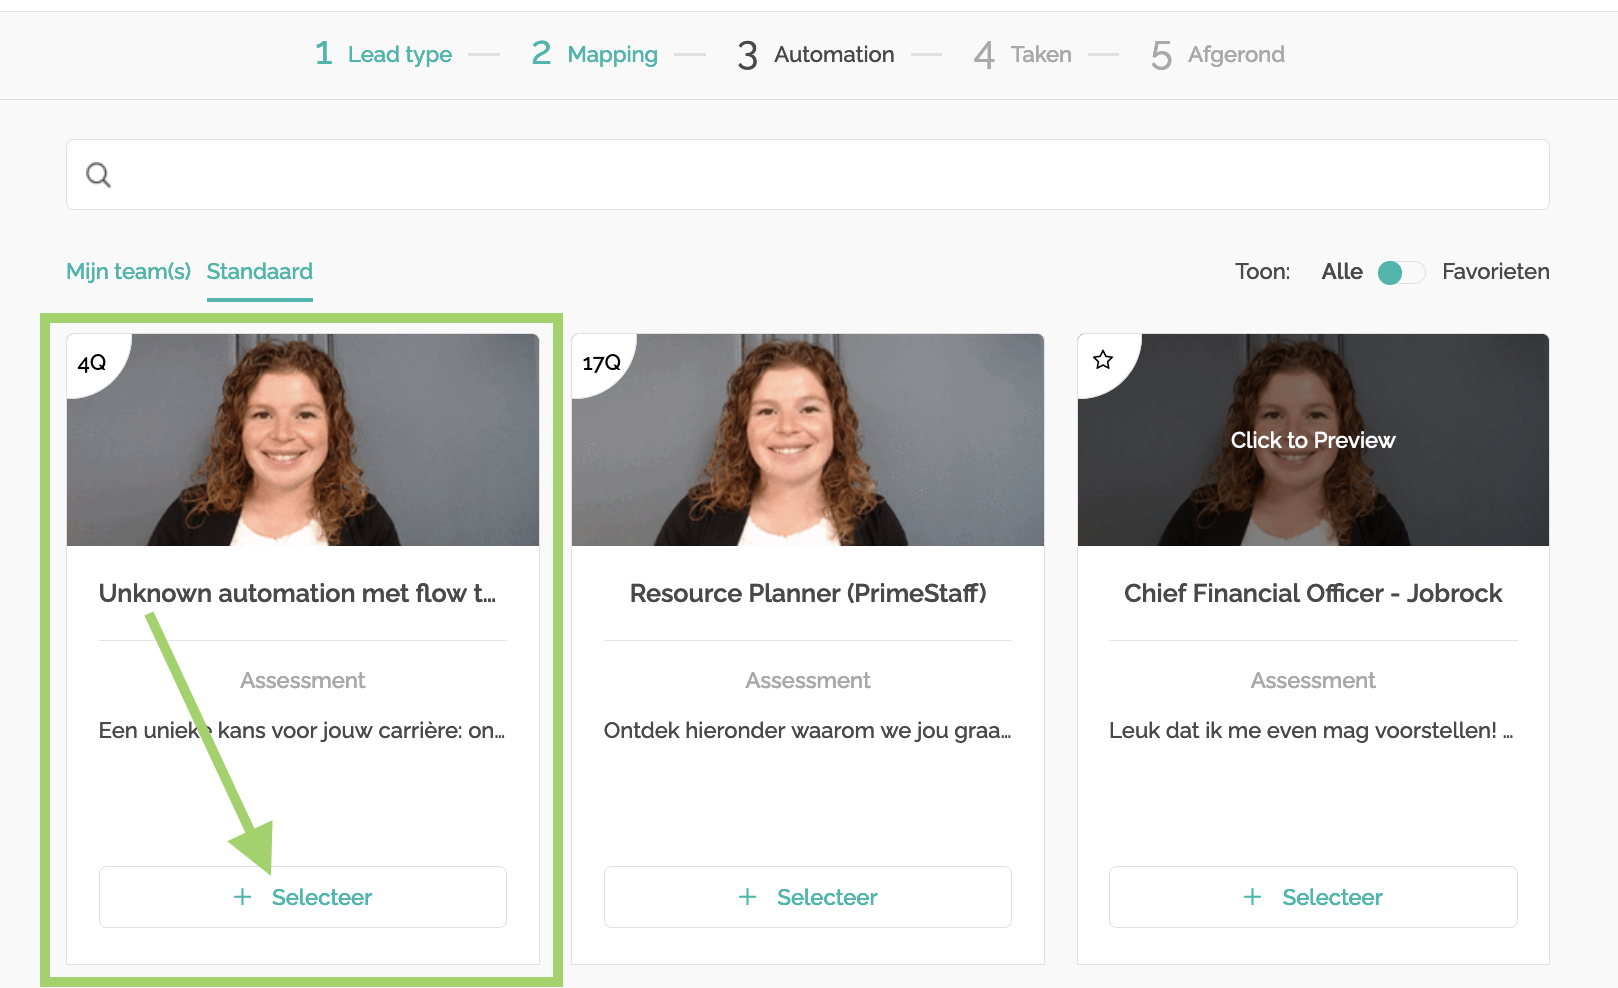
Step 7: Select an Unknown Automation
Select the correct unknown automation to be configured for this template.
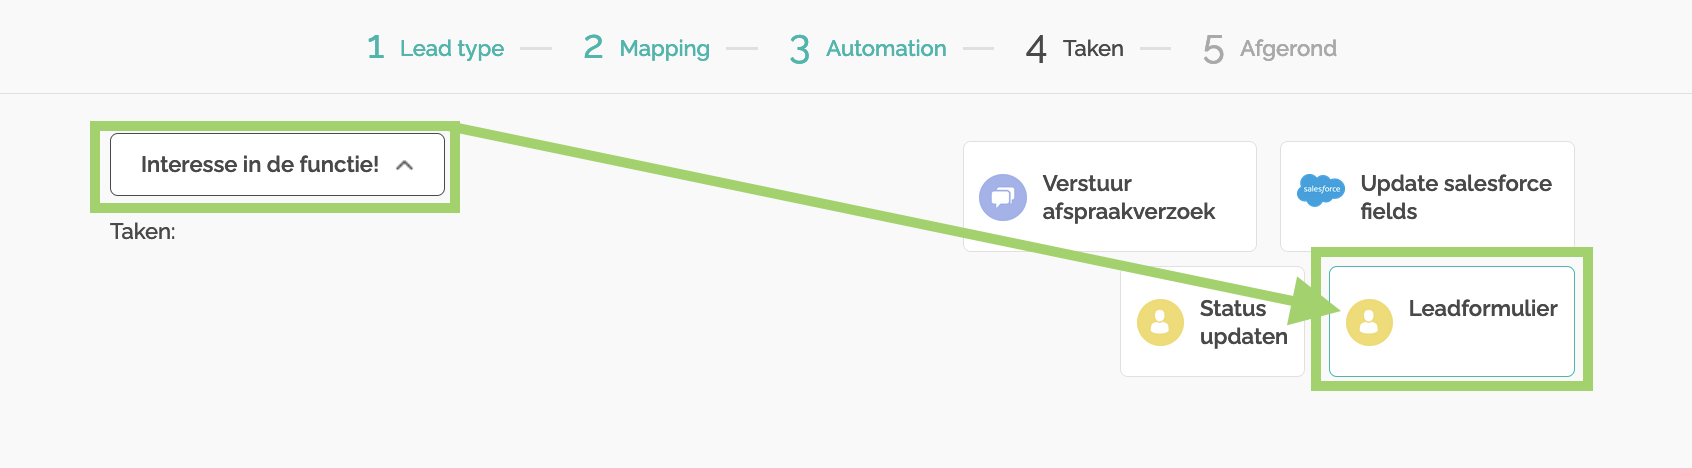
Step 8: Add Actions/Tasks
Include necessary actions or tasks for the desired result. Remember, the "Lead Form" action is mandatory, as the unknown candidates will have to enter their details at the end of the automation.
Optional actions are configuring an appointment invitation, updating Salesforce fields and/or updating the status.
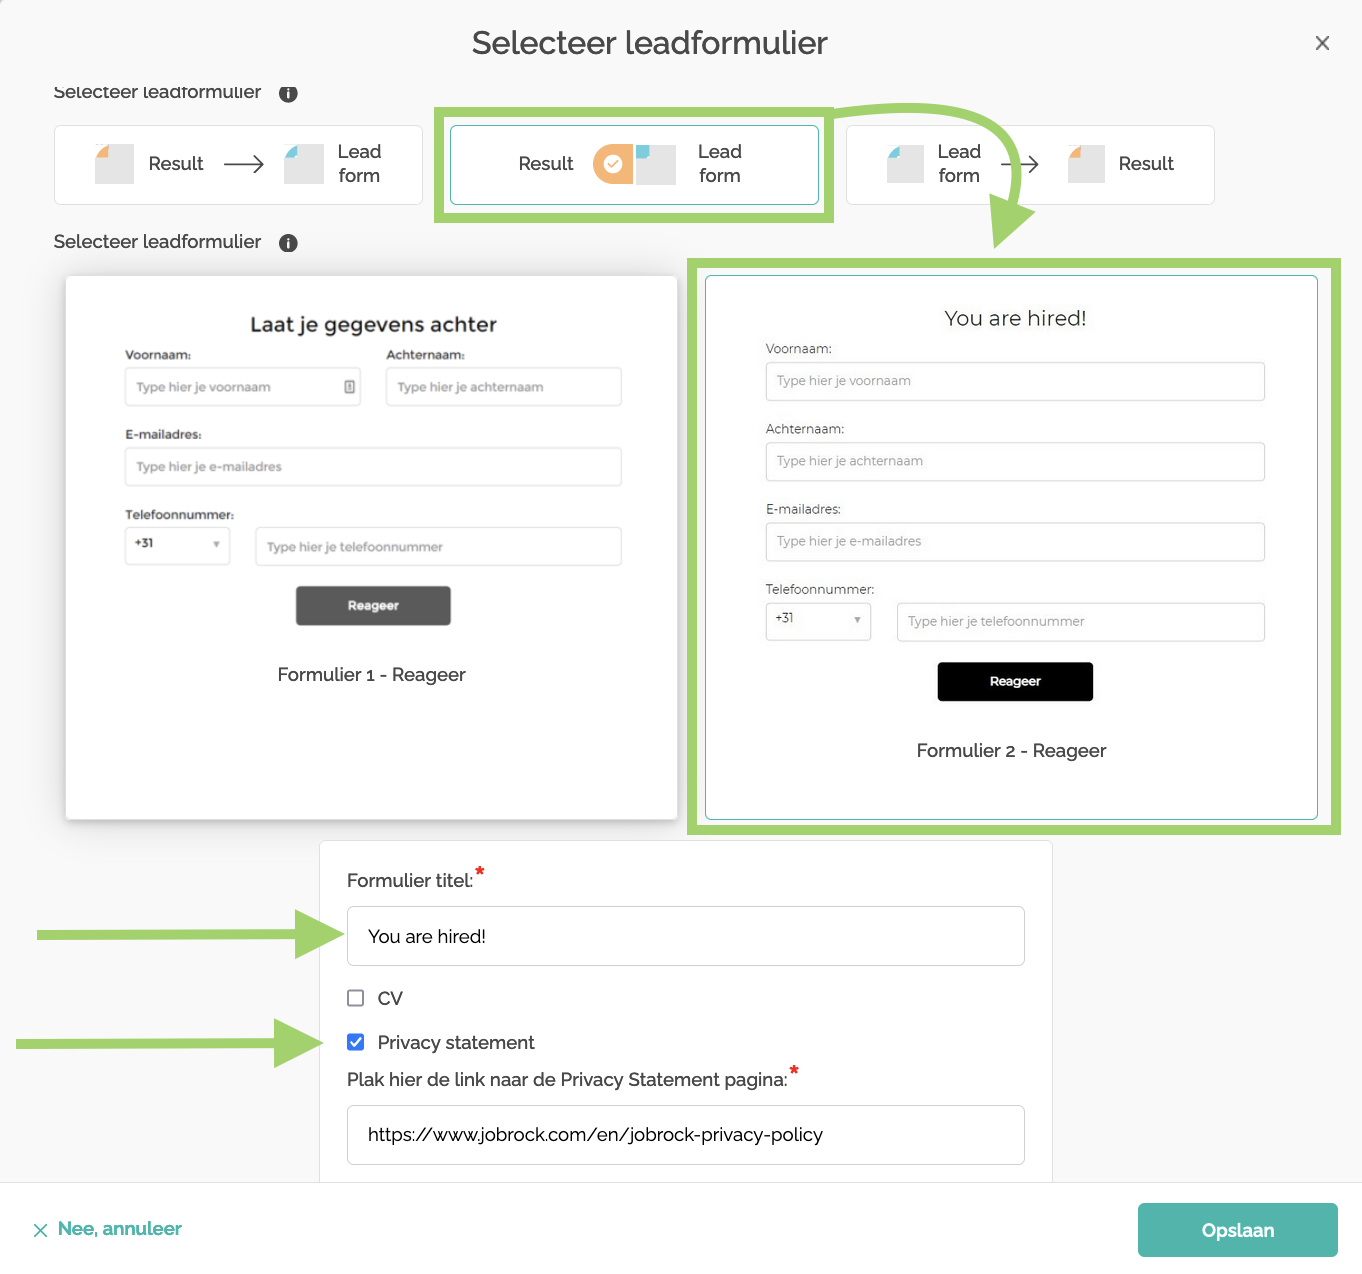
Step 9: Configure the Lead form
Configure the Lead form to fit the user experience you want to achieve. In this example, position the final result page of the automation alongside the Lead form (using the middle option). Don't forget to include a Form title and a privacy statement.
Step 10: Save Configuration
Once all steps are completed, save your configuration.

Step 11: Resynchronize Flow Templates
Return to the Flow templates dashboard and locate your newly created Flow template. Hover over it and click on "Apply to all" to initiate a resynchronization of all templates.

Note: The resynchronization process may require some time to complete.
Step 12: Validate via the Hub
If the template is linked to a job/vacancy, it will appear in the "Linked Template" section on the hub.
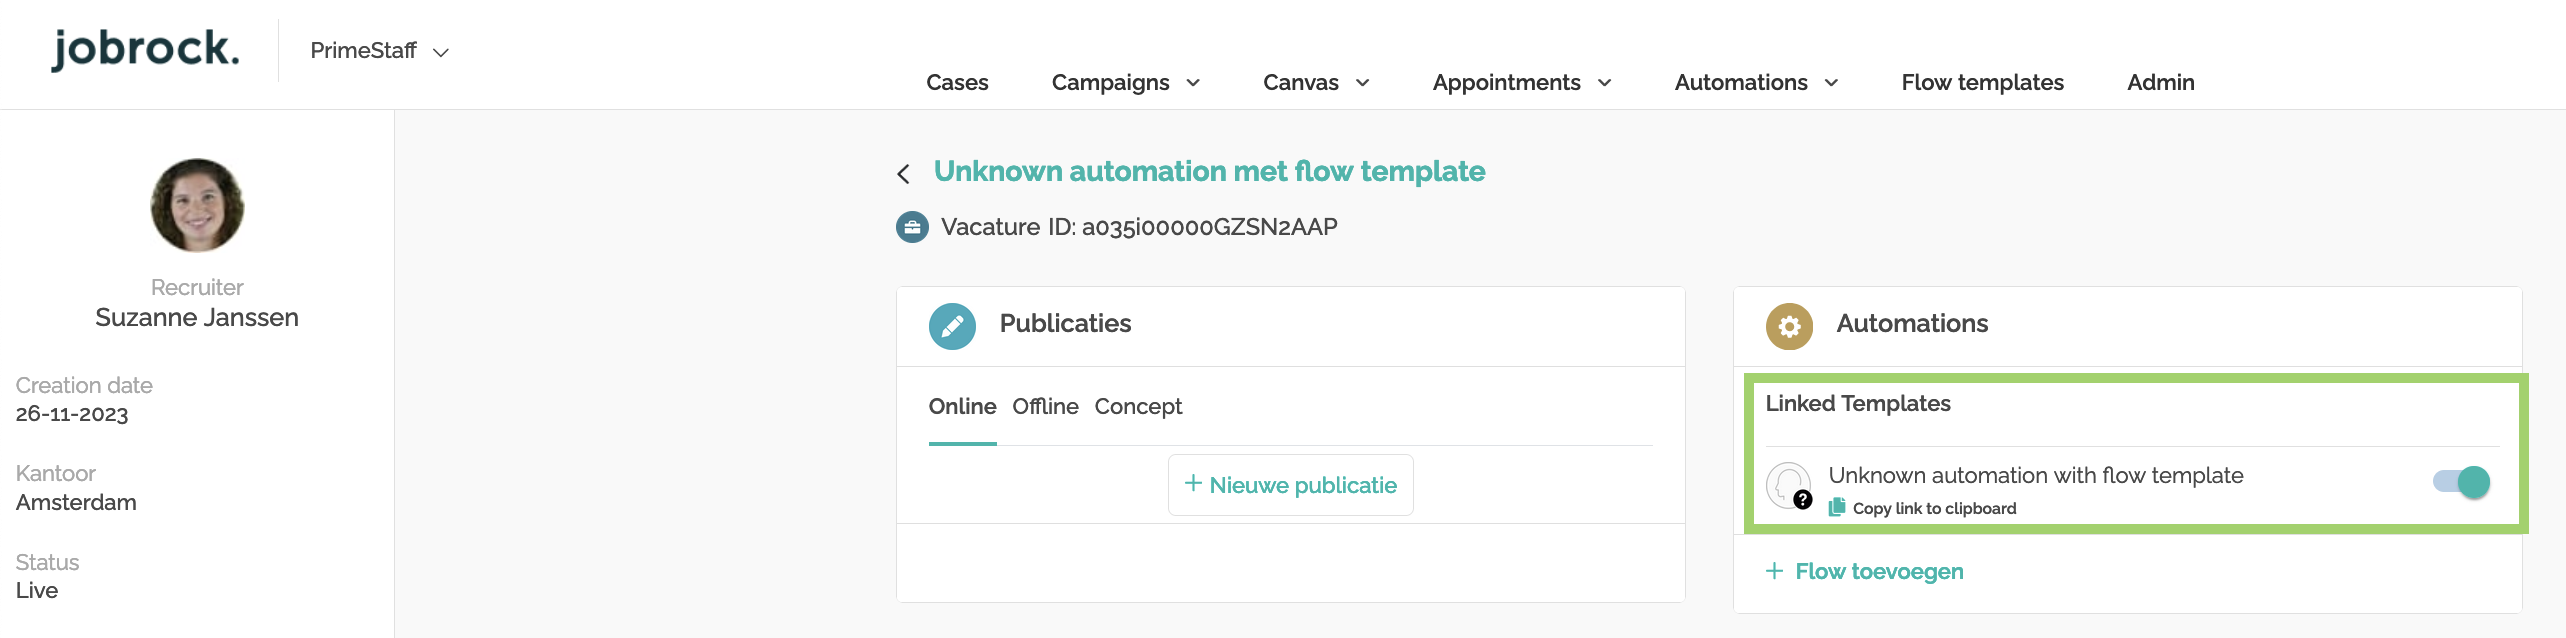
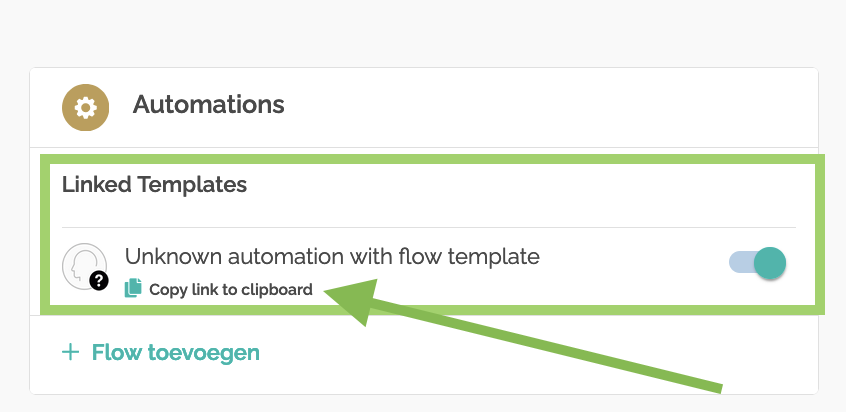
Step 13: Copy Automation Link
Use the "Copy link to clipboard" option to copy the URL of the unknown automation and use it as needed.
Step 14: Test your Configuration
As an administrator, ensure a thorough testing of your unknown automation configuration with this checklist:
- UI Appearance: Verify the display on both desktop and mobile. Does it look as expected?
- Question and Flow Accuracy: Check if all questions and flows are correctly set up.
- Result Page and Lead Form: Confirm that the result page and lead form appear correctly on the UI.
- Salesforce Integration: Verify if your test application is accurately reflected in Salesforce.
- Action Execution: Check if all configured actions are being executed as intended.